Gestionați grupurile de utilizatori
From LimeSurvey Manual
General
Funcționalitatea „Grupuri de utilizatori” a fost adăugată pentru ca utilizatorii de administrare a grupului să poată fi puși în grupuri individuale. Nu există permisiuni reale legate de un grup. Grupurile servesc mai mult ca o macrocomandă sau o comoditate textuală pentru a lucra cu grupuri de utilizatori de administrare.
Gestionarea grupului de utilizatori
Dacă faceți clic pe butonul „Creați/editați grupuri de utilizatori” situat în dialogul „Configurare”, veți fi direcționat către pagina de gestionare a „grupului de utilizatori”.

Creează grupuri de utilizatori
Pentru a adăuga un grup de utilizatori, faceți clic pe butonul „Adăugați un grup de utilizatori nou” situat în colțul din stânga sus al ferestrei. Introduceți numele și descrierea grupului de utilizatori și faceți clic pe „Salvare”:

Acum, puteți adăuga utilizatori la grupul de utilizatori nou creat selectând utilizatorul dorit din lista verticală și făcând clic pe butonul „Adăugați utilizator”.
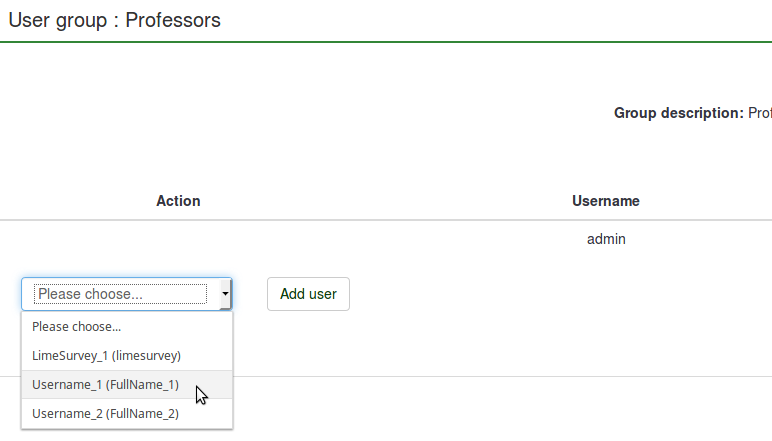

Faceți clic pe „Închidere” (partea din dreapta sus a ferestrei) pentru a reveni la lista de grupuri de utilizatori. Puteți observa grupul nou adăugat în listă. Următoarele detalii sunt furnizate în tabel:

- ID grup de utilizatori: Afișează un ID unic care este atribuit automat fiecărui grup de utilizatori.
- Nume: Numele grupului de utilizatori.
- Descriere : Descrierea grupului de utilizatori.
- Proprietar : proprietarul/creatorul grupului de utilizatori. Proprietarul nu poate fi schimbat. Dacă este necesar, trebuie să ștergeți grupul și să creați altul.
- Membri : Afișează numărul membrilor grupului de utilizatori;
- Acțiune : Ultimul coloana arată un set de acțiuni care sunt disponibile pentru fiecare grup de utilizatori din lista de grupuri de utilizatori. Următoarele acțiuni ale grupului de utilizatori sunt prezentate mai jos: „Afișați utilizatorii”, „Editați grupul de utilizatori”, „Trimiteți prin e-mail grupul de utilizatori” și „Ștergeți grupul de utilizatori”.
Vizualizați membrii grupului de utilizatori
Dacă faceți clic pe tabelul verde, va fi afișată o vedere mai detaliată a membrilor grupului de utilizatori.
Editați grupul de utilizatori
Făcând clic pe stiloul verde, vă permite să editați „numele” și „descrierea” grupului de utilizatori respectiv.
Email user group
The green mail symbol allows the group administrator to send mass emails to the members of that user group. Its functionality includes:
- Send me a copy: If ticked, an email will be sent to the owner of the user group/the one who created the user group.
- Subject: Type in the desired subject of your email.
- Message: Type in the desired message you wish to send to the members of the user group.
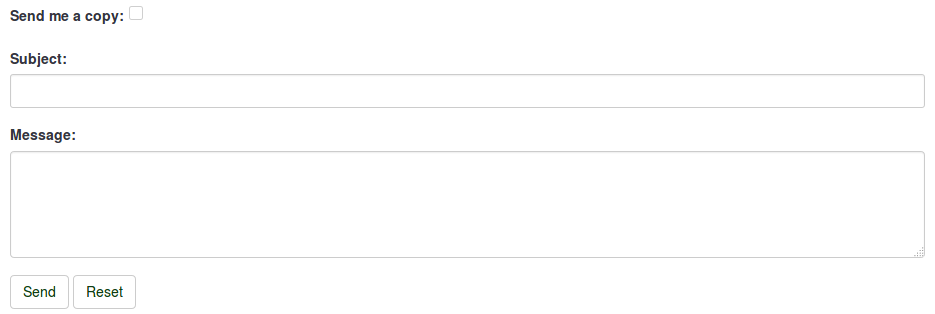
Then, click the Send button located under the Message text box.
Delete user group
To delete a user group, click the red wastebin button that is located on the line with the user group that you wish to delete and hit OK.
Grant survey permissions to a user group
A user group can be used to offer specific survey permissions, like editing the questions, activating the survey, and/or viewing the responses among others. Adding a user group behaves like a macro function that simply adds all the current members of the user group with the same privileges at that same time to the Survey.
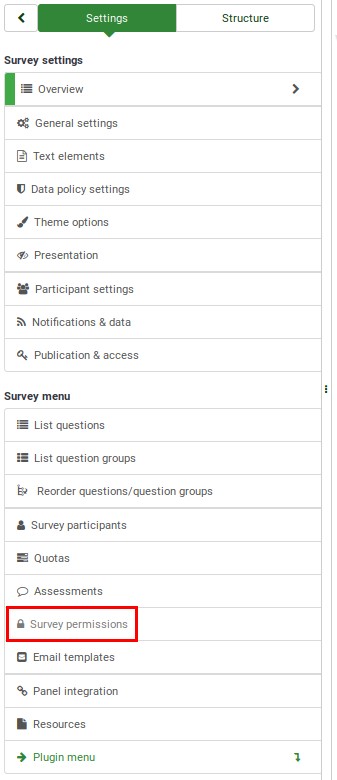
To change the survey permissions, go to the Settings menu of your survey. Click on Survey permissions and choose the user group that should be granted survey permissions:

Select in the next step the permissions that you allocate to the members of that user group. Do not forget to click the double-right arrowhead to get an extended view of the permissions matrix.
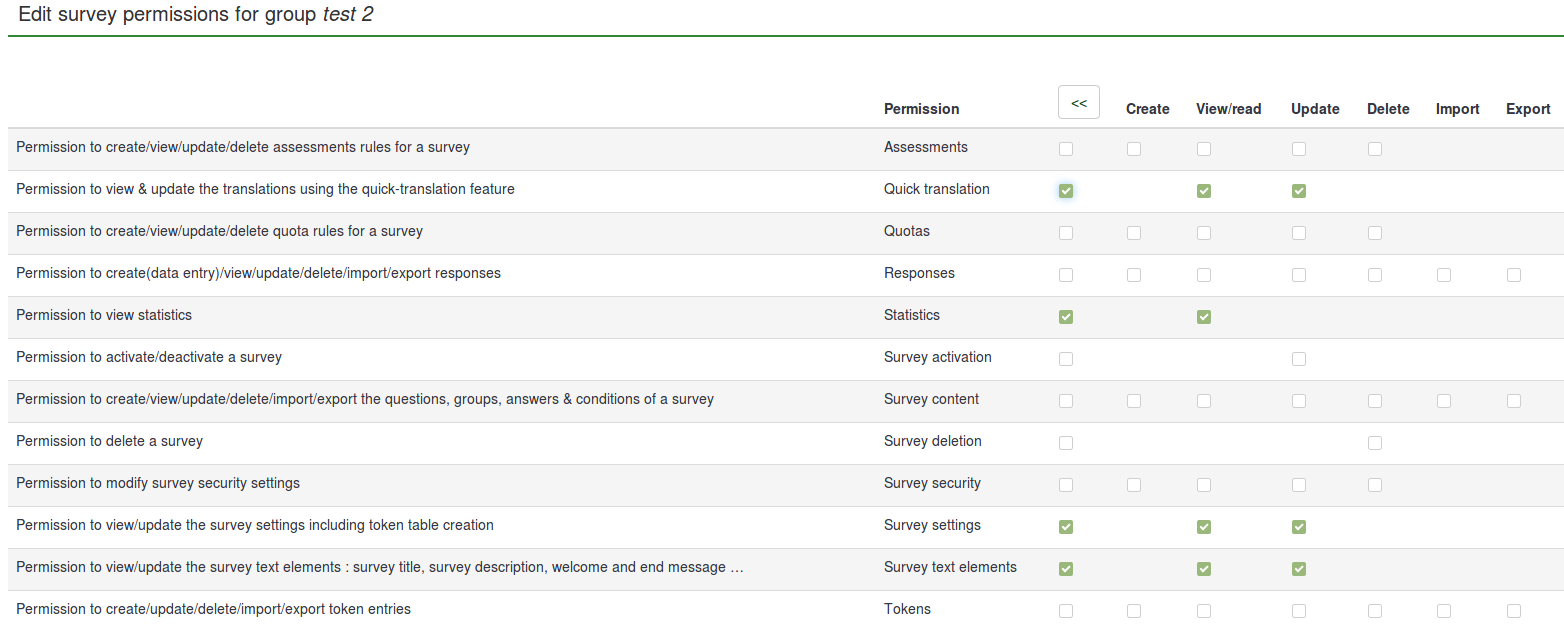
After you have finished editing the survey permissions, click the Save button, which is located in the upper right part of the screen. Some examples are provided below in order to help you get a better understanding of the Limesurvey's survey permissions system.
Things to watch out for
Some limitations of the user group functionality are presented below:
- Changes to a user group (after it was added in the survey) will not cause changes to the survey permissions. For example, if new users are added to a user group that has been already granted survey permissions, the respective new users won't have the same survey permissions as the rest of the user group members. For this to happen, the updated user group has to be granted survey permissions again so that the new user group members can receive the same permissions as the rest of the user group members.
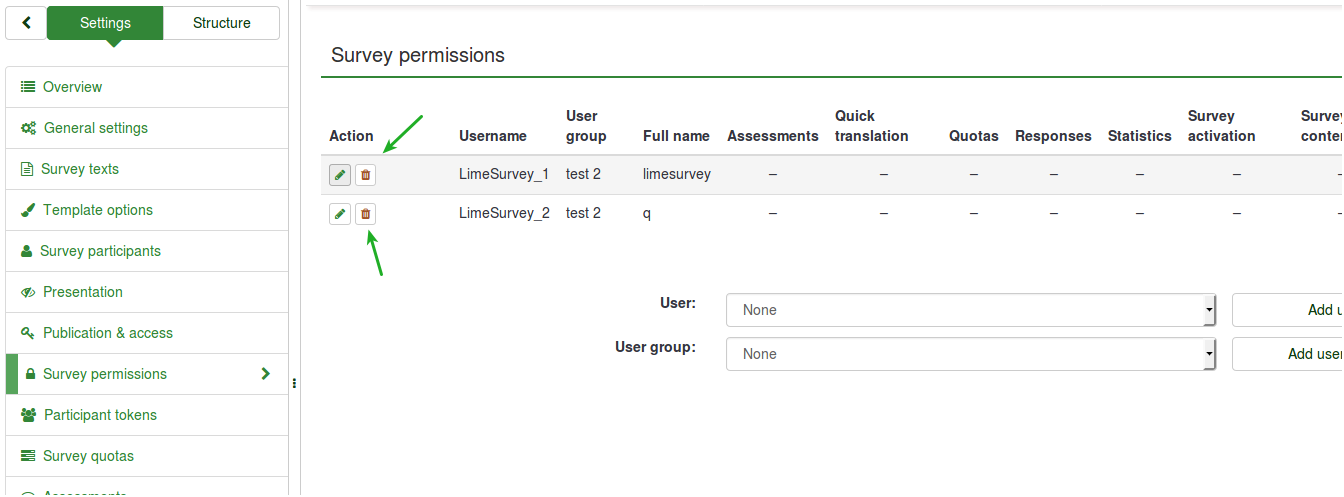
- If you delete a user from a user group with survey permissions, the respective user will not lose the user group survey permissions. To remove his or her permission rights, delete the account from the survey permissions table.
Because the user group functions are still experimental, we kindly ask you to pay attention to any inconsistencies you may find while using LimeSurvey and report them via the bugs tracker (recommended) or the ticket system.
Examples
Some examples are provided below to help you better understand how a LimeSurvey user group works:
Informing members of a user group that they have received certain survey permissions
- Log in.
- Go to the user groups list and click the green mail sign (located on the last column of the table).
- Type the subject and the text body of the email.
- Send it.
Granting certain permissions to a user group
- Log in as admin (or as a user that has the 'Survey security' and 'Survey content' permission).
- Create a user group.
- Add users to the user group.
- Go to the Survey permissions page of the survey.
- Add the user group and offer its members the survey permissions you wish them to have.
Adding a user to a user group
As mentioned above, adding a user group behaves like a macro function that simply adds all the current members of the user group, easing the process of granting survey permissions. However, if a new member is added to that user group, that member will not automatically receive the rights that were previously granted to the other members of the user group. Therefore, you will have to repeat the steps shown in the example from above in order to grant him or her the same rights or you just add him or her separately, using the Add user function (from the 'Survey permission' panel).
Removing permissions of a user no longer in a user group
Removing him from the group should leave him without any user group permissions. However, this is not happening due to the limitations of the user group functionalities! If you delete the user from the user group, he or she still remains with the user group survey permissions. Therefore, a workaround is to manually delete the account from the 'Survey permissions' table.
- Log in as administrator (or as a user with 'Survey security' permission).
- Go to the Survey permissions page, which can be accessed from the Settings of the survey.
- Delete the respective user from the 'Survey permissions' table.

Removing all user group members with access to a survey
As mentioned above, deleting a user from a group won't retrieve his survey permissions. The same goes for 'user groups'. Deleting a user group won't retrieve the survey permissions that were previously granted to the members of the respective user group. At the moment, the only viable solution is to have them manually removed from the 'Survey permissions' table.