Survey quotas
From LimeSurvey Manual
Introduction
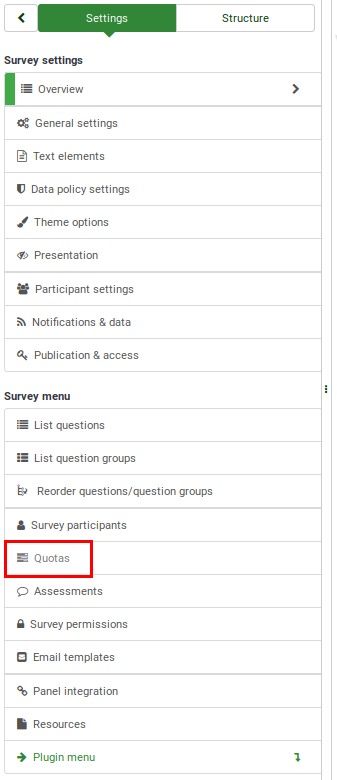
A quota is used to set a limit on responses from defined groups of people on an active survey. Some common attributes used in defining quotas are gender, age, race, province/state, etc. To access the survey quotas panel, from the Settings Survey menu, select the survey Quotas tab.
How do quotas work?
To understand how the LimeSurvey quota system works, think of a survey that contains a "Yes or No" question and an Array question, each of them belonging to two different question groups. You set a quota on this survey that contains a restriction of 20 users who have answered "Yes" to this question. The quota will be checked every time someone answers "Yes" to that question.
Depending on the format of your survey (how the questions are displayed to your participants), the check happens either when you submit:
- the whole survey answers at once: If the format of the survey is all in one, the questions (regardless of the question group they belong to) will be displayed on the same page. Therefore, the user has to click the submit button in order to trigger the quota limit check;
- the answers to a question group: If the format of the survey is group by group, then the quota is activated when the survey participant has responded to all the questions that belong to the question group where the answer that contains the quota system check is located. Therefore, the quota may be triggered before the end of the survey if, for example, the question group is located in the beginning of the survey.
- the answer to a question: If the format of the survey is question by question, each question will be displayed separately, each of them being allocated a page. In this case, if you select the answer that the quota is applied to, the quota system will be automatically triggered once you click the Next/Submit button.
If "No" is chosen, the quota system is not triggered. Therefore, the survey will not restrict anyone from responding to the rest of the questions, unless otherwise specified.
To set a limit on the number of "No" responses, you need to add an additional quota, restricting the number of participants who choose "No".
Using more answers and quotas
Example: You want to conduct a survey where you want to limit it to 25 male and 30 female participants. In this case, you will have to apply two quota limits: one on males and one on females. This will give you a maximum of 25 males who can complete the survey, and a maximum of 30 females who can complete the survey..
Let's suppose now that you want 50 answers from males and 50 answers from females. Please note that each answer that triggers the quota must be introduced in its own quota box. Adding the two answers in the same box will result in collecting 50 answers, regardless of the respondents' gender distribution (e.g., the distribution can be 40 males and 10 females, or 20 males and 30 females, and so on). Continue reading this wiki page and see the examples subsection get a grasp on the usage of the quota system.
Activating the quota system while the survey responses table is not empty
Note that a quota system does not necessarily have to be added before you activate your survey. If you decide to activate the quota system at a later date, it will start to check the survey responses table and look for those entries that are marked as complete. Then, it checks to determine if the quota condition has been met or not. If it has been met, the next survey responses/entries received will be marked as incomplete.
For example, if you have previously gathered 1000 responses from women and you introduced after a couple of weeks the quota limit of 800 for women, the next responses that you receive from women will be marked incomplete. The other 200 answers will appear in the survey responses table as complete because the quota was applied after the answers were collected.
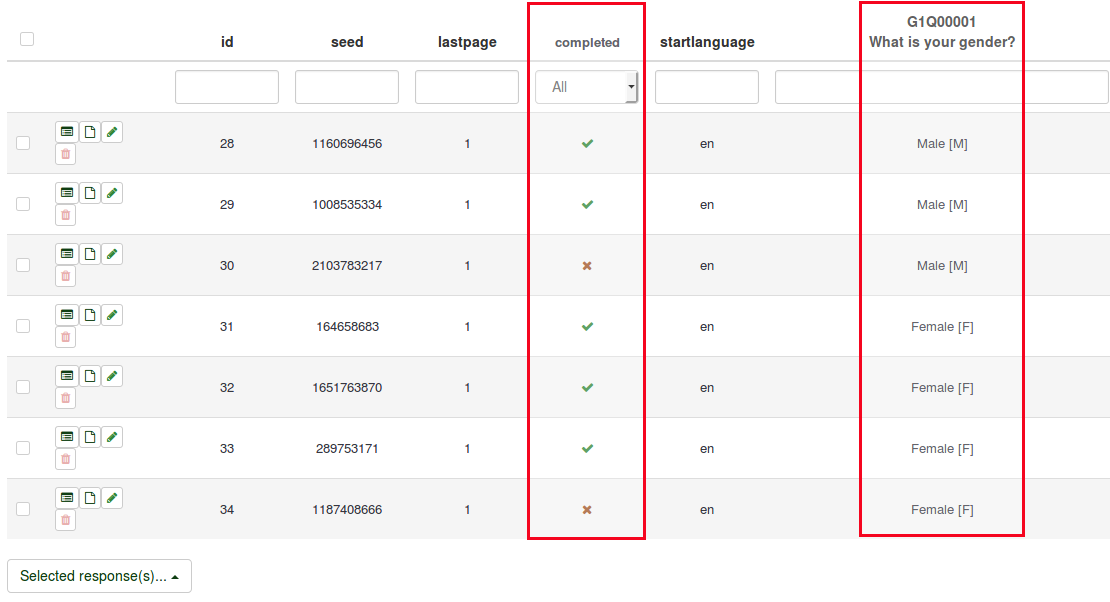
The quota system does not store any answers and it does not record the number of the submitted survey answers! Think of it as a filter that is applied on the survey responses table. Basically, it looks into the completed column and those question columns that contain the answers to which one or more quotas are applied to.
Supported question types
The quota system can be applied only to the following types of questions at the moment:
- Gender
- Multiple Choice
- Array - 5 Point Choice
- Array - 10 Point Choice
- Language Switch
- Yes/No
- List (Radio)
- List (Dropdown)
- List with comments
- Equation
Survey quotas panel
Once you click the Survey quotas tab from the survey menu, the following page will be displayed:

To see the full set of options of this panel, add one survey quota. Then, the survey quota page will look like the following:

The following options are available:
- Add new quota: Located on the bottom right part of the survey quotas table, it allows users to add new quotas. Once quotas are displayed on the table, you can start implementing them to certain questions/subquestions answers.
- Add an answer: Before adding an answer, you need to add a quota where the answer(s) will be stored in. The quota limit will be applied only to those answers displayed in the quota box.
- Edit quota: Click the green pencil located under the Action column of the survey quotas table to edit the fields of a quota
- Delete quota: Click the red trash button located under the Action column of the survey quotas table to delete the respective quota entry;
- Quota validation: Click the last button located under the Action column of the survey quotas table to quickly check the quota message displayed to the respondents, the URL (and/or a short description of it) where they will be redirected.
- Quick CSV report: Exports a summary of the quotas under the form of a comma-delimited CSV table.
- Selected quota(s)...: Works like an aggregator. Select multiple quotas and use this button to apply one of the actions described below to the selected group of quotas.
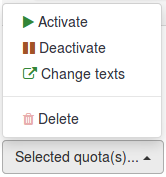
- Activate: Use this button to activate a quota. The active ones have the quota name, action, and URL written in white font on a green background.

- Deactivate: Use this button to deactivate a quota. The deactivated ones have the quota name, action, and URL written in black font on a grey background.

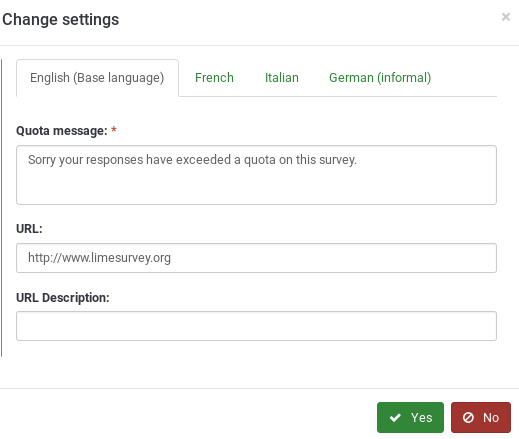
- Change texts: Use this button to quickly change the quota message, URL, and URL description of a group of a quotas. You may use this function to redirect respondents to a certain link once different quota conditions were met.
- Delete: If you want to delete a group of quotas by a few clicks, tick the ones you want to delete, click the selected quota(s) button, and select the Delete option.
Add new quota
For a fully working quota you must first "add a quota", and then "add answers" to that quota.
Once you click the Add new quota button, the following page will be displayed:

The following options are available:
- Quota Name: The name of the quota that will be displayed on the survey quotas table. It should describe the quota it will represent.
- Quota Limit: The maximum number of completed surveys that will be stored in the responses table and marked as complete. See above the wiki section on how do quotas work to better understand the mechanism employed by LimeSurvey.
- Quota Action: If the quota is triggered, then one of two actions will happen:
- Terminate survey: This action immediately terminates and closes the survey.
- Allow user to modify his last answers before terminate survey: Useful action when you want your participants to choose different options. In this way, you can force some of them choose another solution or option. For example, when incentives are offered, you can use a quota on each option so that not everyone chooses the same incentive.
- Autoload URL: This tells LimeSurvey to automatically redirect the participant to the URL when the quota action occurs.
- Quota Message: Write the text you want to be displayed to participants if the quota action is triggered. The message will be displayed if the Autoload URL is disabled.
- URL: The URL displayed to survey participants after the quota action is triggered. The users can also be automatically redirected to this URL if "Autoload URL" is enabled. You can use URL fields in this section.
- URL Description: A short URL description can be added in order to show to the other survey administrators the purpose of the URL for example.
Add an answer
Once the quota has been created, you can start adding answers. To add answers, access the Survey quotas panel. Look into the survey quotas table and select the Add answer option from the quota box that you want to add the respective answer to.
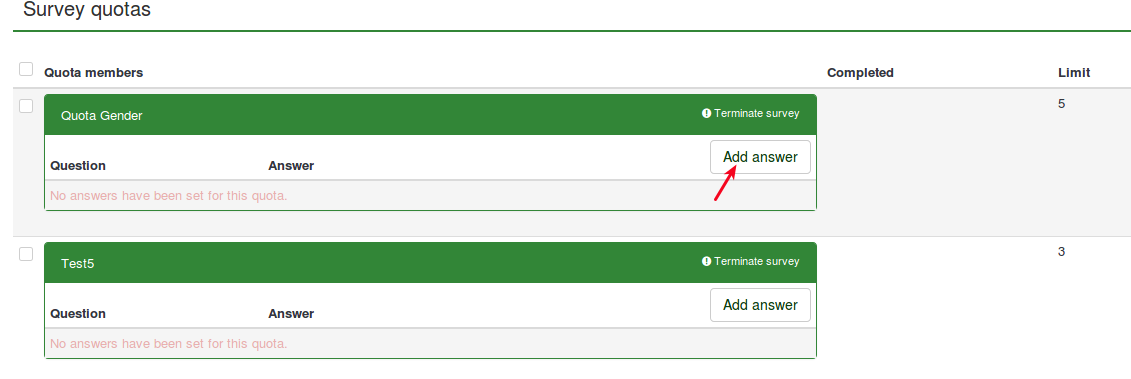
A new page will be displayed asking you to select the question the quota will be applied to.
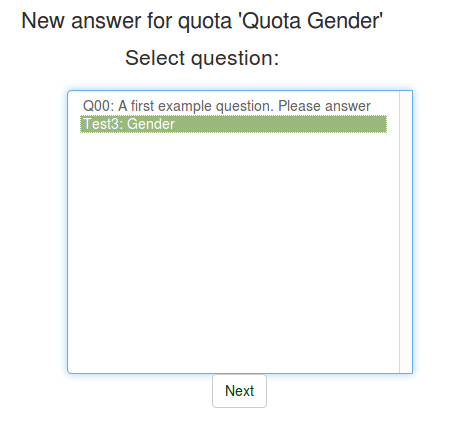
Click Next. The answers of the question you selected one step before will be displayed. Now, you have to choose which answer you want the quota to be applied to.
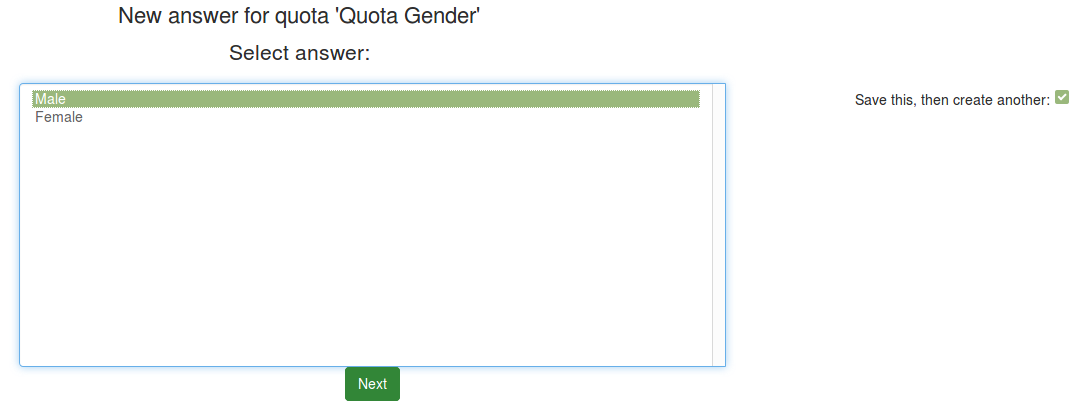
In this example, the "Male" answer will have the quota applied to it. Whenever participants choose this option, the quota system registers the answer. Once the quota limit is reached, the stored survey answers will be saved in the survey responses table, but it will be marked 'incomplete.
Quick CSV report
The quick CSV report function is used to export the survey quotas table in a comma-delimited CSV file. It includes the following fields:
- Quota name: The name of the quotas;
- Limit: If the quota is active, it represents the maximum number of survey responses that can be marked as complete in the survey responses table;
- Completed: The number of survey answers marked as complete in the survey responses table. Please note that an answer is marked as incomplete if the quota is triggered.
- Remaining: The number of answers that can still be collected in the survey responses table and marked as complete there.
Quota and tokens
When the response is not submitted
When tokens are used in a survey and a participant is screened out due to a quota, then the respective token entry from the survey responses table is marked with the letter "Q" in the completed column from the survey responses table. The token is invalidated in this way and the survey participant cannot restart the survey.
When response is submitted
With update responses with one token allowed : a participant can open an already submitted response.
After being submitted, when a response is being edited, quotas are not checked at all. Then a participant can update own response and set a value out of quota.
Examples
The following examples are used to better explain the role of quotas and their usage within the LimeSurvey environment. Before viewing the following examples, please take into account that:
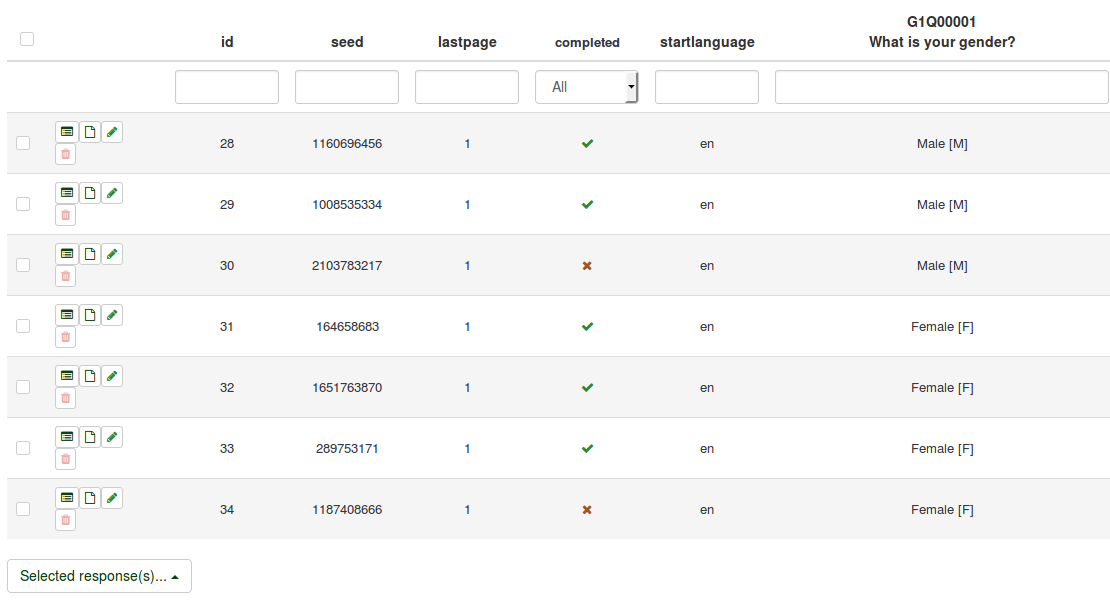
- Answers added in the same quota are summed up. For example, if answers A and B from the available responses of a survey question are added to quota Q1, the quota limit sums up the number of users who pick up A and B as their answers. Therefore, there is a high probability that the distribution of A and B answers will be uneven (dependent on the characteristics or preferences of your respondents).
- Answers added in different quotas act as if there is a logical operator "AND" between them. Let's suppose that A is added to Q1 and B to Q2. If A is chosen and Q1 is reached, then respondents won't get their answers marked complete in the survey responses table. However, the survey participants that choose B are still allowed to continue as long as Q2 is not reached. Once it is reached, participants who further choose A or B as answers to that specific question will have their answers marked incomplete in the survey responses table.
Adding more answers to different quotas
Let's assume that you are doing a survey about LimeSurvey and you would like to receive feedback from your participants. You would like to receive 1000 answers from students (PhD student, graduate, undergraduate) and another 1000 from non-students (unemployed persons, full/part-time working persons or other). In order to do this, create two quotas: Students quota and Non-students quota.

Now, start adding answers to each quota box following the steps described above in the wiki section. The quota boxes should look like this:
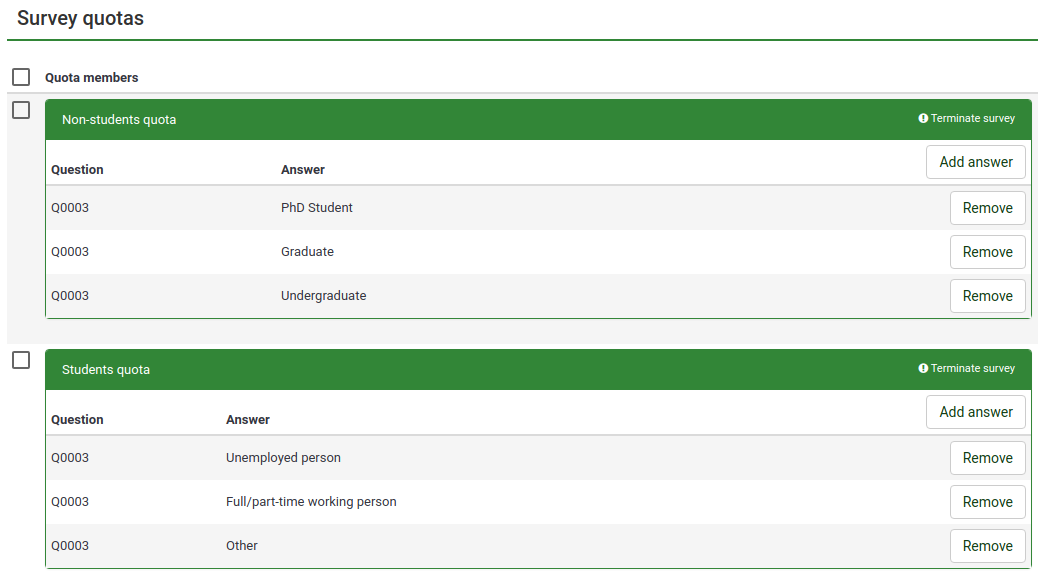
By using this method, you limit the number of responses you receive from the two defined groups: students and non-student groups. Now, activate the survey and start testing the quotas. If you first reach 1000 answers from the non-students group, the next answers you receive from this category will be marked as 'incomplete in the survey responses table. Only answers that come from the students group will still be accepted. Once it also reaches 1000, no more answers will be registered as complete in the survey responses table.
Adding a URL link
To add a URL link to a quota, please continue reading the URL fields wiki section.
Using of equation question for quota in other question type
You can use Equation Question to set a value to supported question types and assignment operator.
The 2 question can be hidden, quota is checked if all question are hidden or when one question is in submitted page.
For example , to set a quota to a text question (user write ok or not) on a Y/N question: {QuotaQuestion=if(strtolower(Q00.NAOK) == 'ok', 'Y', 'N')
You can import and activate this sample survey File:Limesurvey survey quotaEquationAndOptOut.zip (remember to unzip the file and activate the survey).
Like using an equation to set a value to an answer, quota for default values are checked if a question is hidden. This allows you to set a maximum number of response in a specific survey. You put a quota on the default answer in a hidden question and put this question in a simple group.
You can import and activate this sample survey File:Quota by default value sample survey.zip (remember to unzip the file and activate the survey).
