Installation procedure for limesurvey 2.0
From LimeSurvey Manual
LIMESURVEY 2.0 - INSTALLATION GUIDE
Disclaimer
The current release is not a stable version intended for production, which means you are using this software at your own risk! This program is provided "as is" without warranties of any kind, either expressed or implied, including, but not limited to, the implied warranties of merchantability and fitness for a particular purpose. The entire risk as to the quality and performance of the program is with you. Should the program prove defective, you assume the cost of all necessary servicing, repair or correction. In no event will any copyright holder be liable to you for damages, including any general, special, incidental or consequential damages arising out of the use or inability to use the program (including but not limited to loss of data or data being rendered inaccurate or losses sustained by you or third parties or a failure of the program to operate with any other programs).Requirements
Make sure your server meets the following additional requirements:
Required:
- Minimum 80 MB disk space
- MySQL 4.1.0 or later OR Microsoft SQL Server 2000 or later OR Postgres 8.1 or later
- PHP 5.1.2 or later with the following modules/libraries enabled:
- mbstring (Multibyte String Functions) extension library (see also Installation FAQ)
- mysql5 or pgsql PHP library (which is standard with hosting providers - if you have setup your own server make sure it is installed)
Note: We assume that you don't have any PHP standard libraries explicitly deactivated (like sessions, pcre, ctype or others).
Optional PHP Extensions:
- GD-Library with FreeType support installed is needed for captchas or nice charts in statistics - see PHP GD-Library Extension documentation
- LDAP installed is needed to import tokens using LDAP - see PHP LDAP Documentation
- Zip (pretty standard) for template upload and import resources Zip archives - see PHP Zip Extension documentation
- Zlib (pretty standard) is needed for the ComfortUpdate - see PHP Zlib Extension documentation
Upgrading
If you are upgrading from an older version of limesurvey we suggest you to check out and hold close to the instructions, which can be found in our online manual|online manual.
Grabbing the code
- Download the latest limesurvey 2.0 release by following this guide guide. Look for releases marked "2.0"
- Unzip and move the contents into the document root of your webserver. You can install it in a sub-directory of the root if you wish.
Installation
Point your web browser to the directory of your webserver where limesurvey is located.
eg: http://www.your_website.com/limesurvey2.0/
eg: http://localhost/limesurvey2.0/
And you should see something like this.
Follow the link provided.
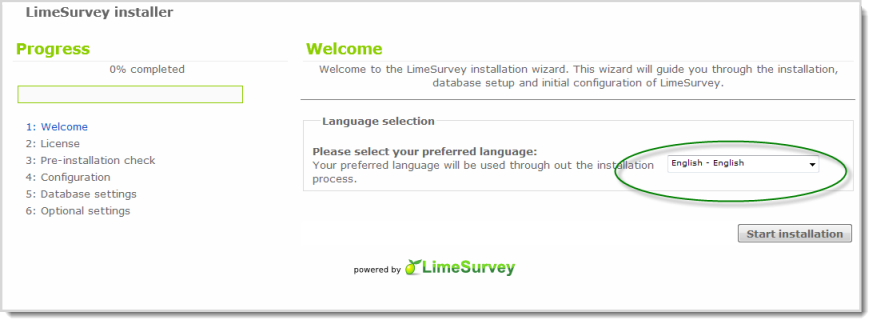
STEP 1 - Welcome
Choosing installation Language (Website language will be set at the end of the installation process).
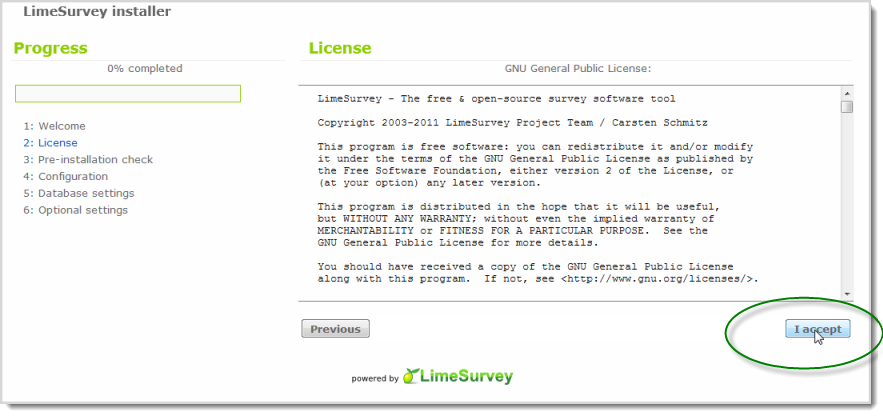
STEP 2 - License
If you agree with the license you may continue.
STEP 3 - Pre-installation check
In this step, system requirements are checked for proper running of limesurvey 2.0.
Required settings are a MUST for proceeding with the installation. All the settings should be fulfilled for the installation to proceed.
Optional settings are required for certain features such as creating and downloading zip files.
You CAN install limesurvey without the optional settings.
If your webserver is running linux you may find yourself in the following situation where you don't have read and write permissions.
You can fix this problem by changing file permissions of the files or folders to 755.
This can be achieved using the ftp client if you want to install limesurvey on your remote server or if you install limesurvey locally
you can issue the chmod command in the terminal,
eg: chmod 755 application/config/database.php (you must be in the limesurvery2.0 directory for this to work)
Press check again and be sure that all your required settings are in order.
Notice: If 755 still doesn't give you write access try using 777.
Your screen should look something similar to this.
STEP 4 - Configuration
Database type: In general it's MySQL. But you can check your server for more details.
Database location: localhost in most cases if the website and database are on the same server or give the ip/url (eg.193.12.34.21/www.example.com) where the database is hosted.
Database name: choose a name for example "limesurvey".
- If the database "limesurvey" already existing then the new tables will be appended to it i.e. old tables will remain in it.
- If "limesurvey" doesn’t exist, it will be created and populated with the new tables.
Database user/password: Database login details. These details are required to authenticate the installer to add new tables to the database.
Database prefix: Optional you can leave it blank. It's useful if you have a shared database.
Your screen should look something like this.
STEP 5 - Database settings
If database "limesurvey" already exists you would see a screen like this:
If database "limesurvey" doesn’t exist already you would see a screen like this:
Follow the steps and populate the database.
STEP 6 - Optional settings
You can fill these settings now or you can fill them later.
And also here you have the option to change the website language.
If you choose to skip this part the following defaults are provided.
- username : admin
- password : password
Don’t forget to change your username password later if you haven't done it now.
Success!
If you can see the following screen, then you have successfully installed limesurvey2.0 in your server.
The following errors could occur at the end of the installation:
- delete failed
Solution: Remove the files manually
After that go to your admin panel and login:
eg: http://www.your_website.com/limesurvey2.0/index.php/admin
eg: http://localhost/limesurvey2.0/index.php/admin


