Többnyelvű felmérés
From LimeSurvey Manual
Bevezetés
A LimeSurvey egy beépített szolgáltatást tartalmaz, amely lehetővé teszi a felmérések gyors és egyszerű fordítását. Ez a lehetőség arra szolgál, hogy az emberi fordító könnyen lefordítsa a felmérést az alapnyelvről bármely meghatározott célnyelvre.
Ez a wiki rész gyorsan bemutatja, hogyan lehet többnyelvű felmérést létrehozni. Az útmutató olyan témákat fed le, mint például:
A wiki részben elemzett példa innen tölthető le: LS3 többnyelvű felmérés minta. Csomagolja ki, és importálja az .lss fájlt a LimeSurvey példányába.
További nyelvek hozzáadása
A felmérés alapértelmezett nyelve az, amelyet a alapnyelvi mezőben választott ki. Alapértelmezés szerint ez a példány global settings részében beállított nyelv.
Az alapnyelv ellenőrzéséhez nyissa meg az általános felmérési beállítások panelt, és keresse meg az alapnyelv mezőt. Példánkban az alapnyelv az "angol". Új nyelvek hozzáadásához, amelyekre le szeretné fordítani a felmérést, tekintse meg a További nyelvek mezőt. Példánkban három másik nyelv került kiválasztásra: francia, német és olasz.
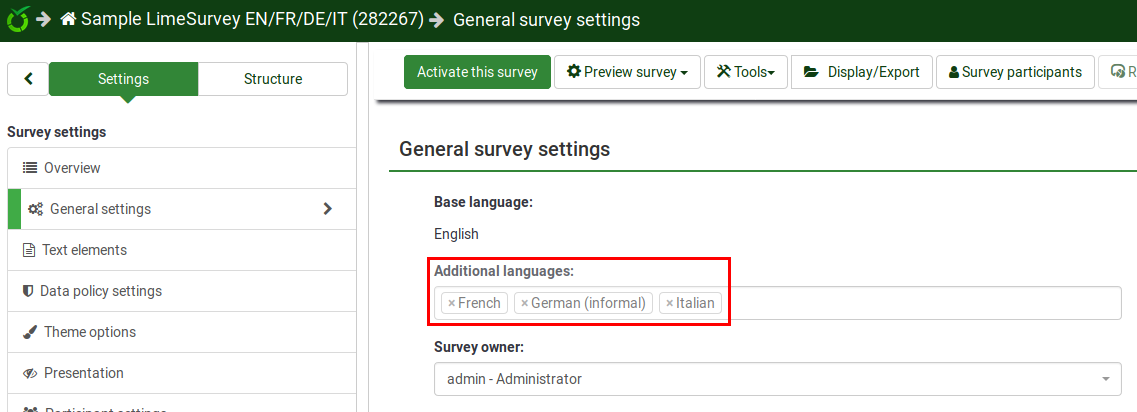
Ha elkészült, ne felejtsen el kattintani a képernyő jobb felső sarkában található '"Mentés" gombra.
Most, ha bejelöli a felső eszköztárat, láthatja, hogy egy kis nyíl jelent meg a "Kérdés előnézete" mellett. Ez azt jelenti, hogy a felmérés előnézete különböző nyelveken tekinthető meg:

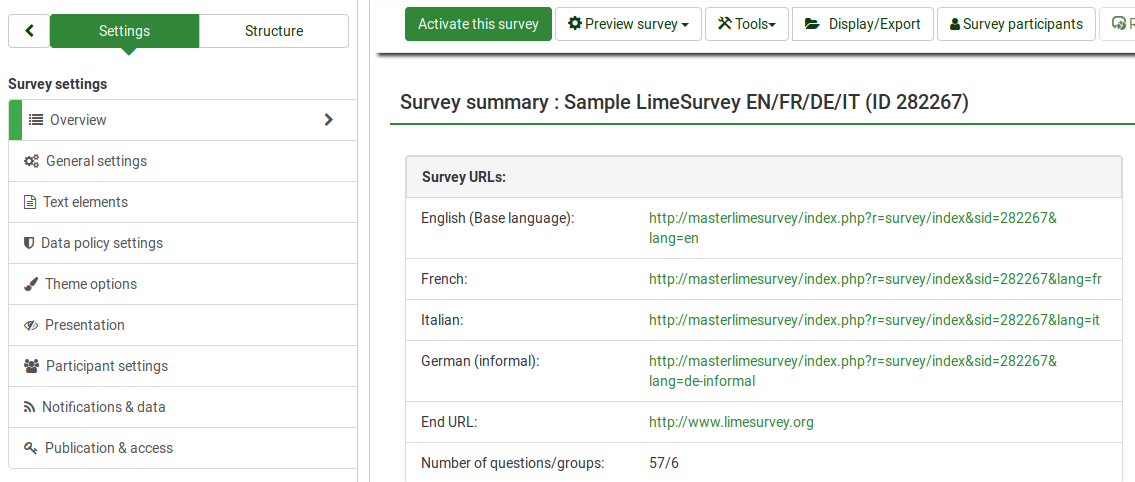
Ha megnyitja az áttekintés panelt, négy további felmérési link jelenik meg. Ezek megfelelnek a nemrég hozzáadott nyelveknek:
Karakterláncok fordítása
A karakterláncok fordításának megkezdéséhez nyissa meg az egyes kérdések szerkesztőpaneljét. Az alábbi képernyőképen megfigyelhető, hogy a kérdéskód mező felett három további nyelv jelenik meg:
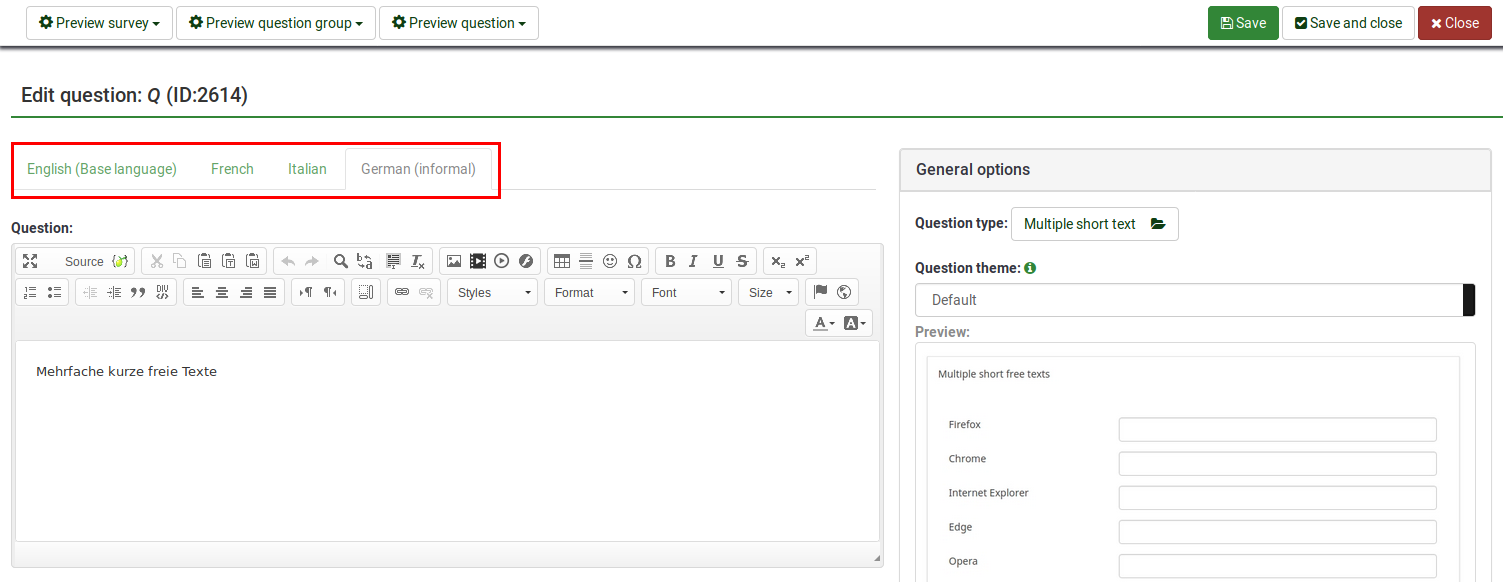
Click on any of them and start translating the question field.
The same type of "language bar" is located in many other places such as in the text elements and data policy settings panels, answer and subquestion text fields, and so on. However, translating fields using this method can get tricky if your survey is long and you wish not to miss anything. That is why we heavily recommend our users to use the quick translation tool. To access it, click on any survey-related setting (such as "Overview") -> Tools -> Quick-translation
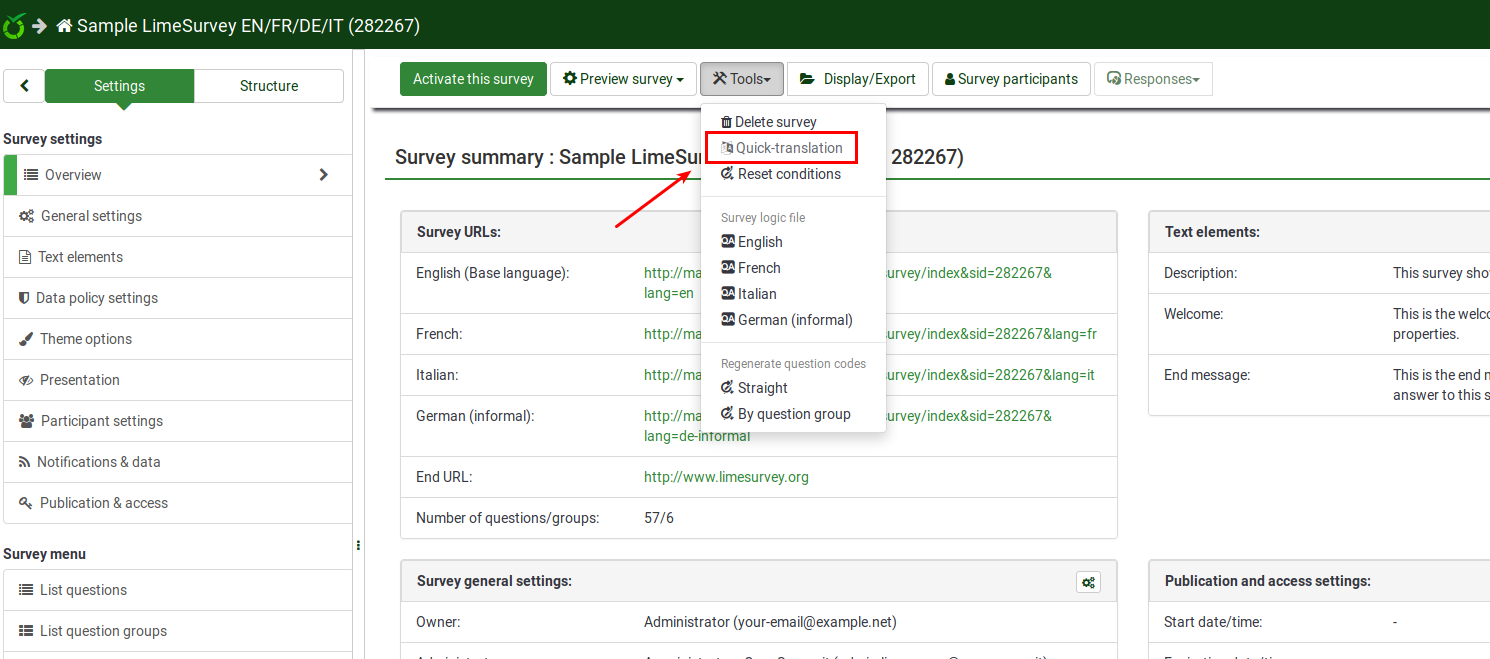
Quick-translation tool
The quick-translation tool has been specifically designed for those that work with multilingual surveys. Once accessed, the following panel will be loaded:
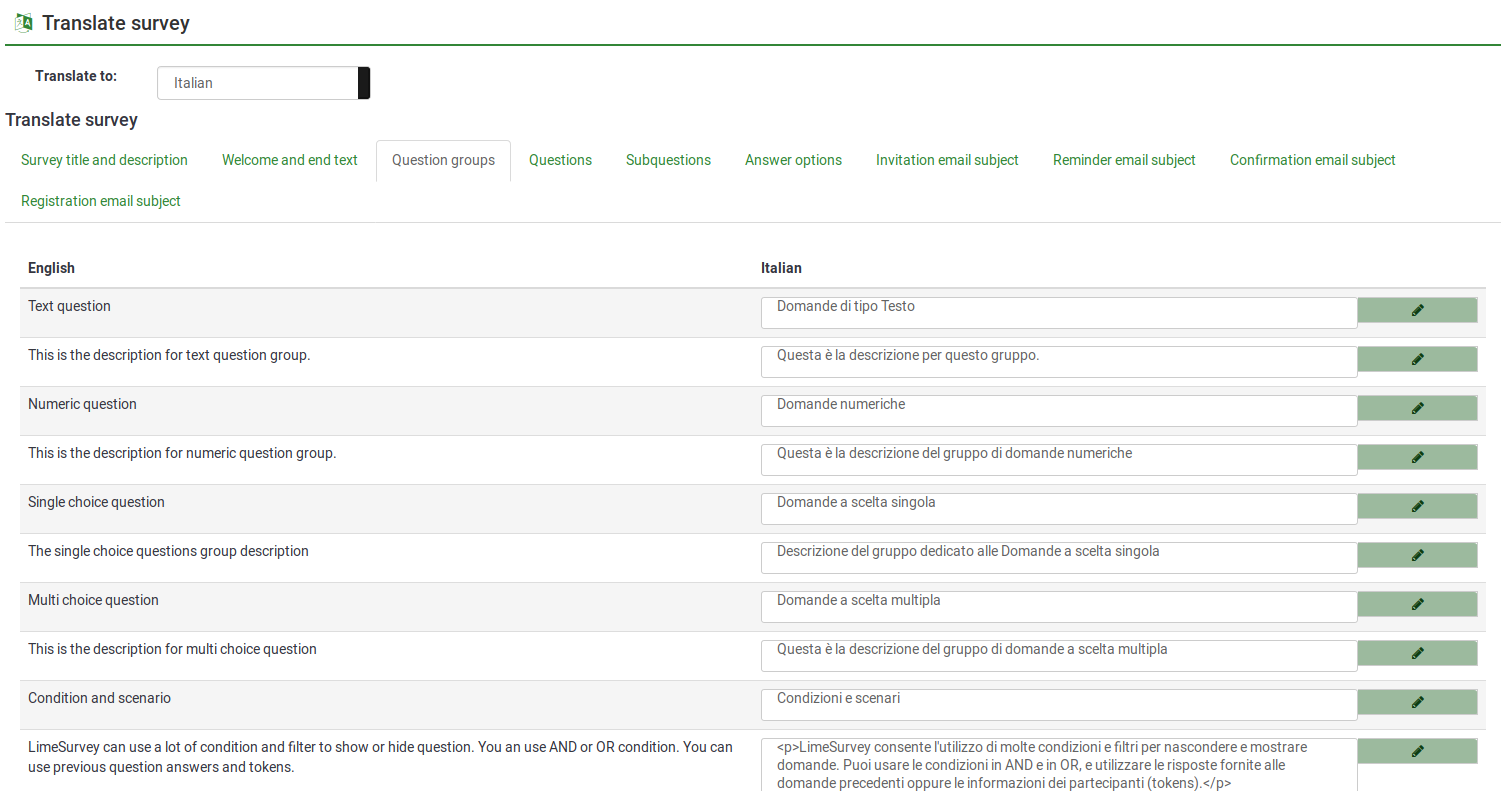
The first option, translate to, gives you the possibility to select the language you wish to translate into from your base language.
The next options refer to the translation of your survey content. They refer to:
- Survey title and description
- Welcome and end texts
- Question groups
- Questions
- Subquestions
- Answer options
- Invitation email subject
- Reminder email subject
- Confirmation email subject
- Registration email subject
Once you are done translating these fields, do not forget to click on the "Save" button located in the upper right part of the panel.
Multilingual survey overview
To check your work, use the preview button. The welcome page will look like this:
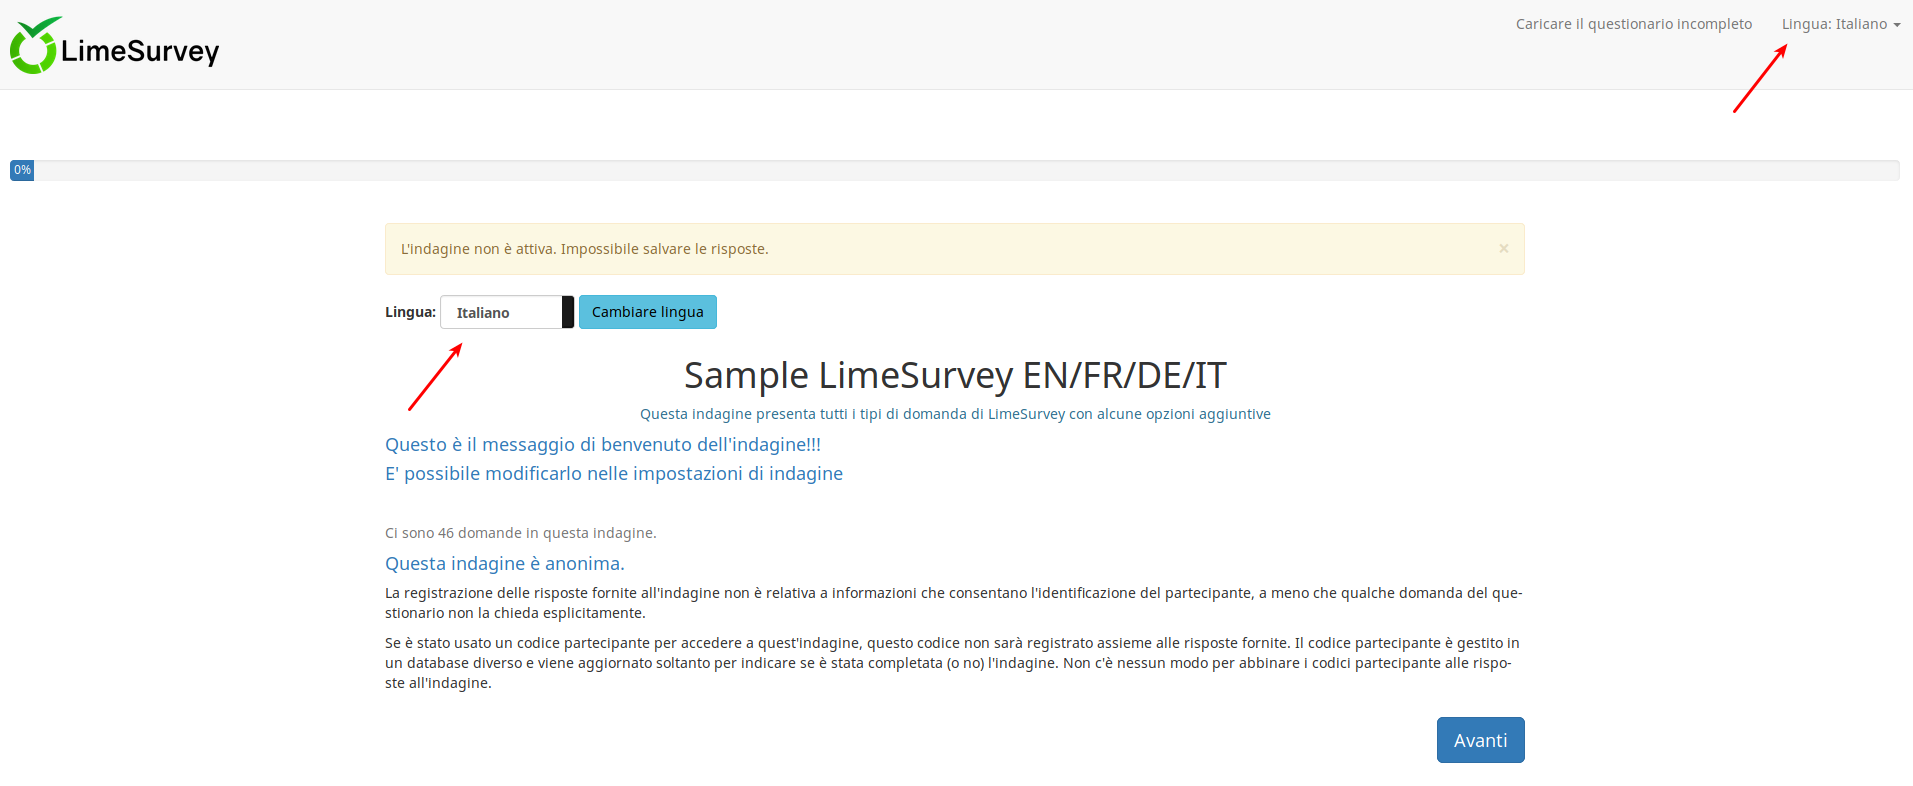
Two language switcher can be observed once the welcome page is loaded. LimeSurvey offers the possibility to your respondents to change the language of instructions even though you shared with them the corresponding link for a specific language. A language switcher will also be located on the top right-side of your survey.
In the case in which you wish to hide the two "language switcher" buttons, edit the theme of your survey. For more details, see the hints & tips wiki subsection.
Hints & tips
- If you wish to grant users translation permissions to access the quick-translation tool, check the following wiki subsection.
- The "Auto-translate" feature makes use of the Google translate web service for automatic translation of a survey. You must enter your Google Translate API Key under global settings to access this feature. Google currently charges $20 US per 1 million characters submitted for translation.
How to hide the language switcher from the welcome page
In the case in which you decide to launch a multilingual survey, you will observe on the welcome page a drop-down menu that permits your respondents to select the language in which they wish to fill in your survey:

However, in certain scenarios you wish to hide the respective option. There are many ways in which you can hide the language switcher. The "twig" way is displayed below.
Access Themes from the global Configuration menu:

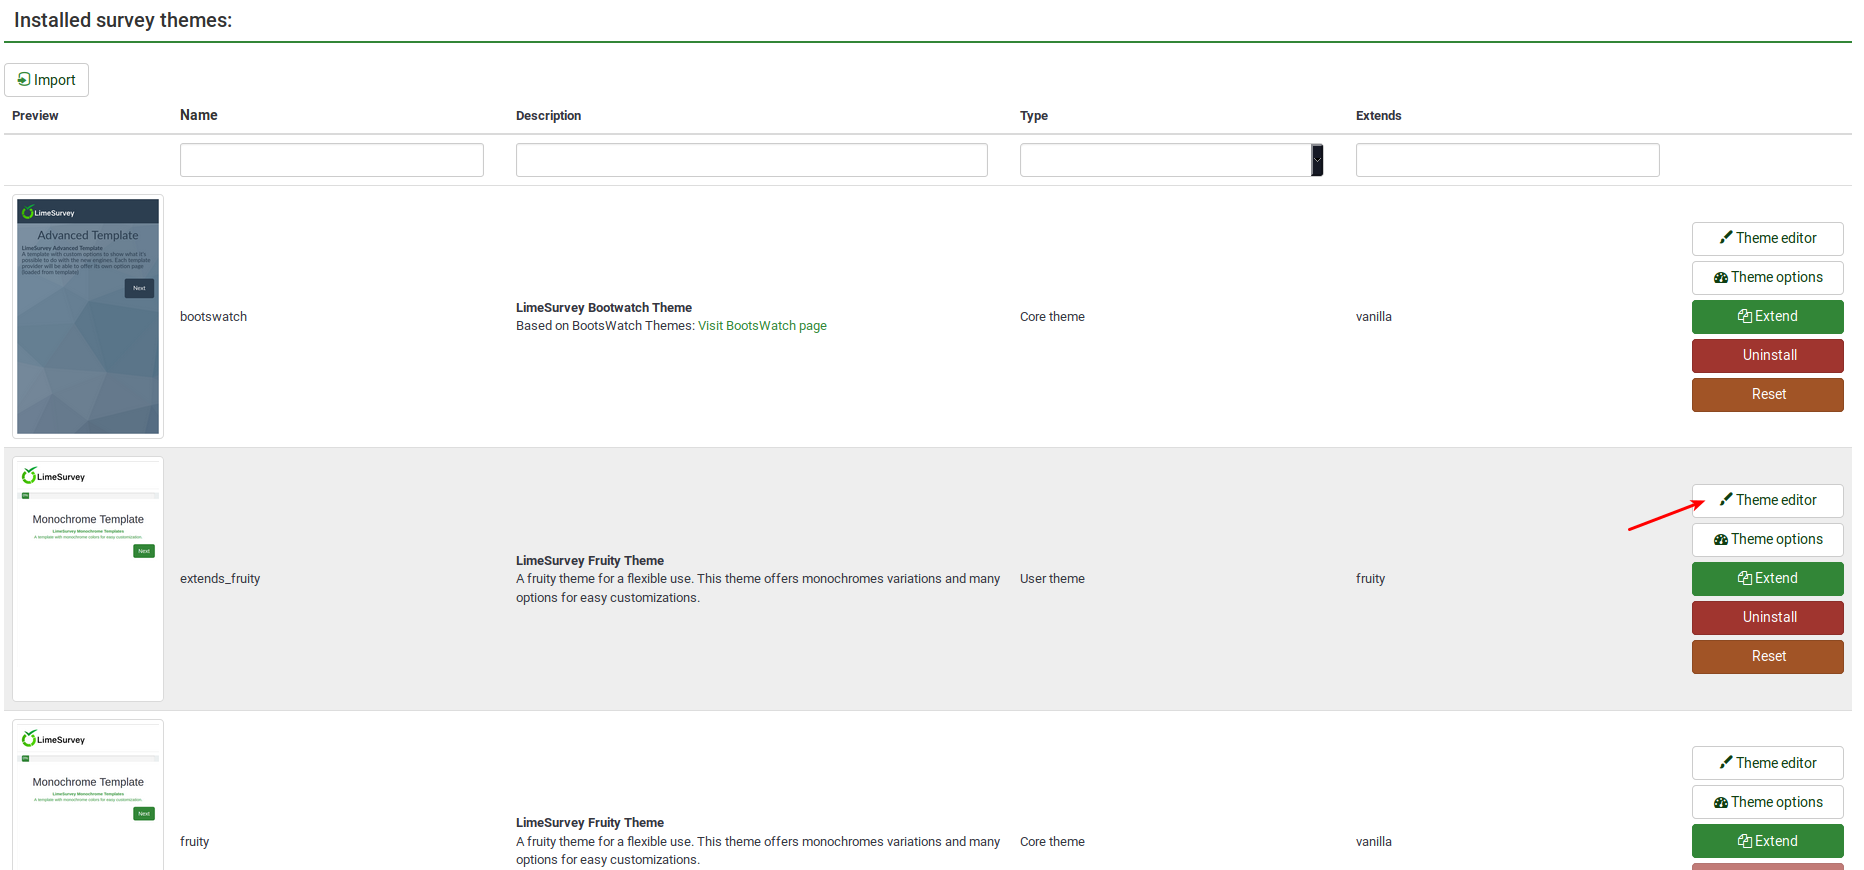
Click on the Theme editor button to edit the desired theme:
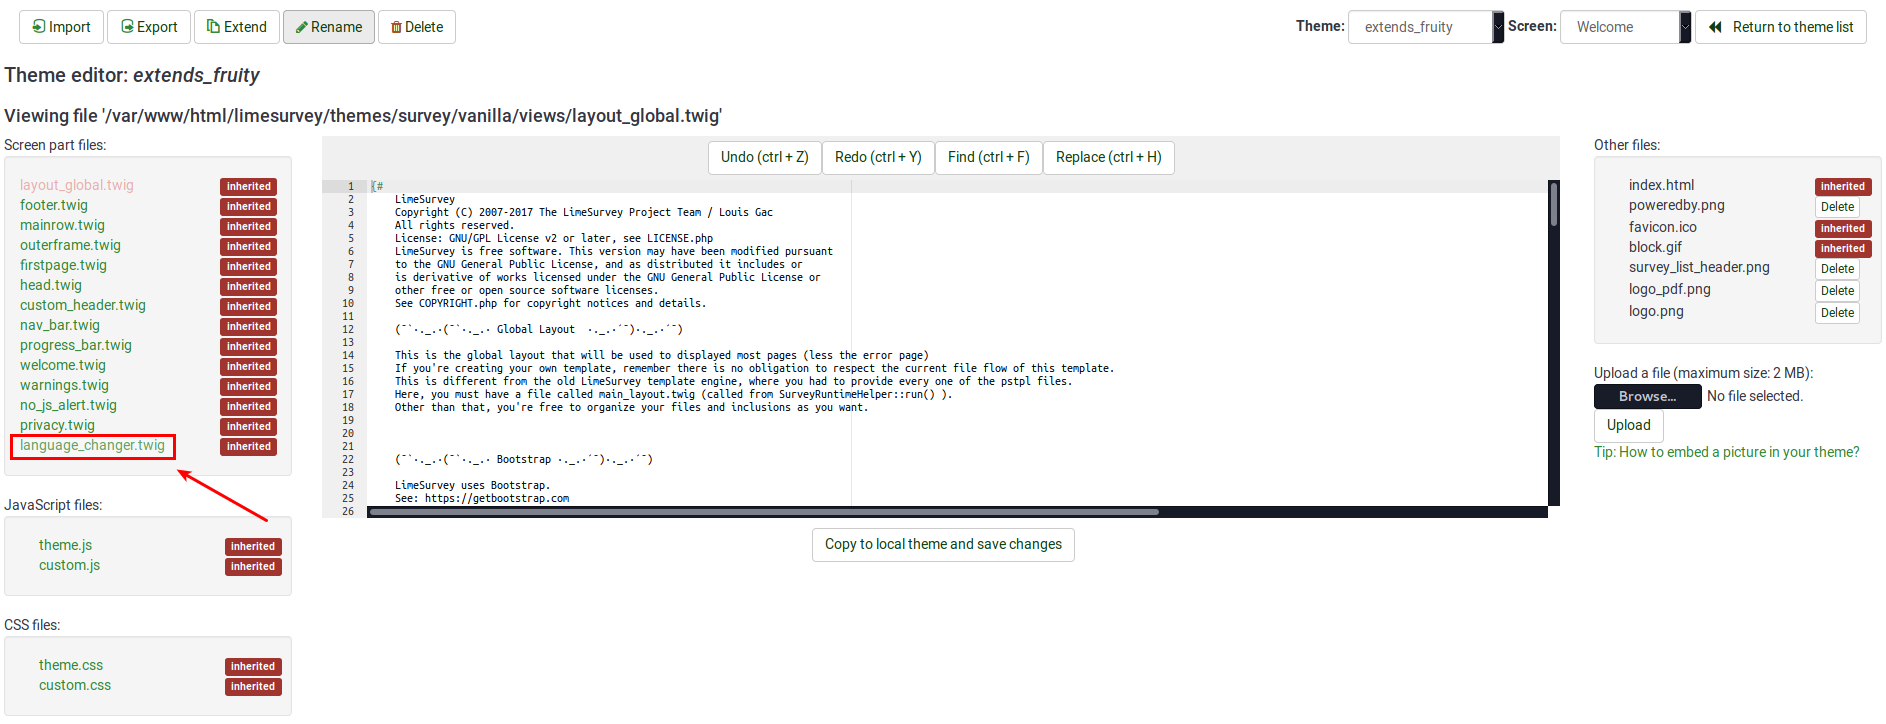
Look on the left side of the screen for the language_changer.twig file.
Go to the line that contains the following function:
{% if aSurveyInfo.alanguageChanger.show == true %}
Comment it out (replace "%" with "#") and copy the following line below it:
{% if false == true %}
The line should look like this in the end:

Click on "Copy to local theme and save changes".
Access your survey and select the edited theme from the general settings panel. Now, the welcome page should look like this:

To hide the top language switcher, we will follow pretty much the same steps as described above. We just have to access the right twig file to edit it. Access again the theme you wish to change, and then go to Screen which is located in the upper-right part of the window and select Navigation from the dropdown list. Now, look on the left side of the window for "language_changer_top_menu.twig". Click on it and comment out:
{% if aSurveyInfo.alanguageChanger.show == true %}
Add the following line below it:
{% if false == true %}
No language switcher will be displayed on the right side of the screen:
