メニュー項目設定
From LimeSurvey Manual
概要
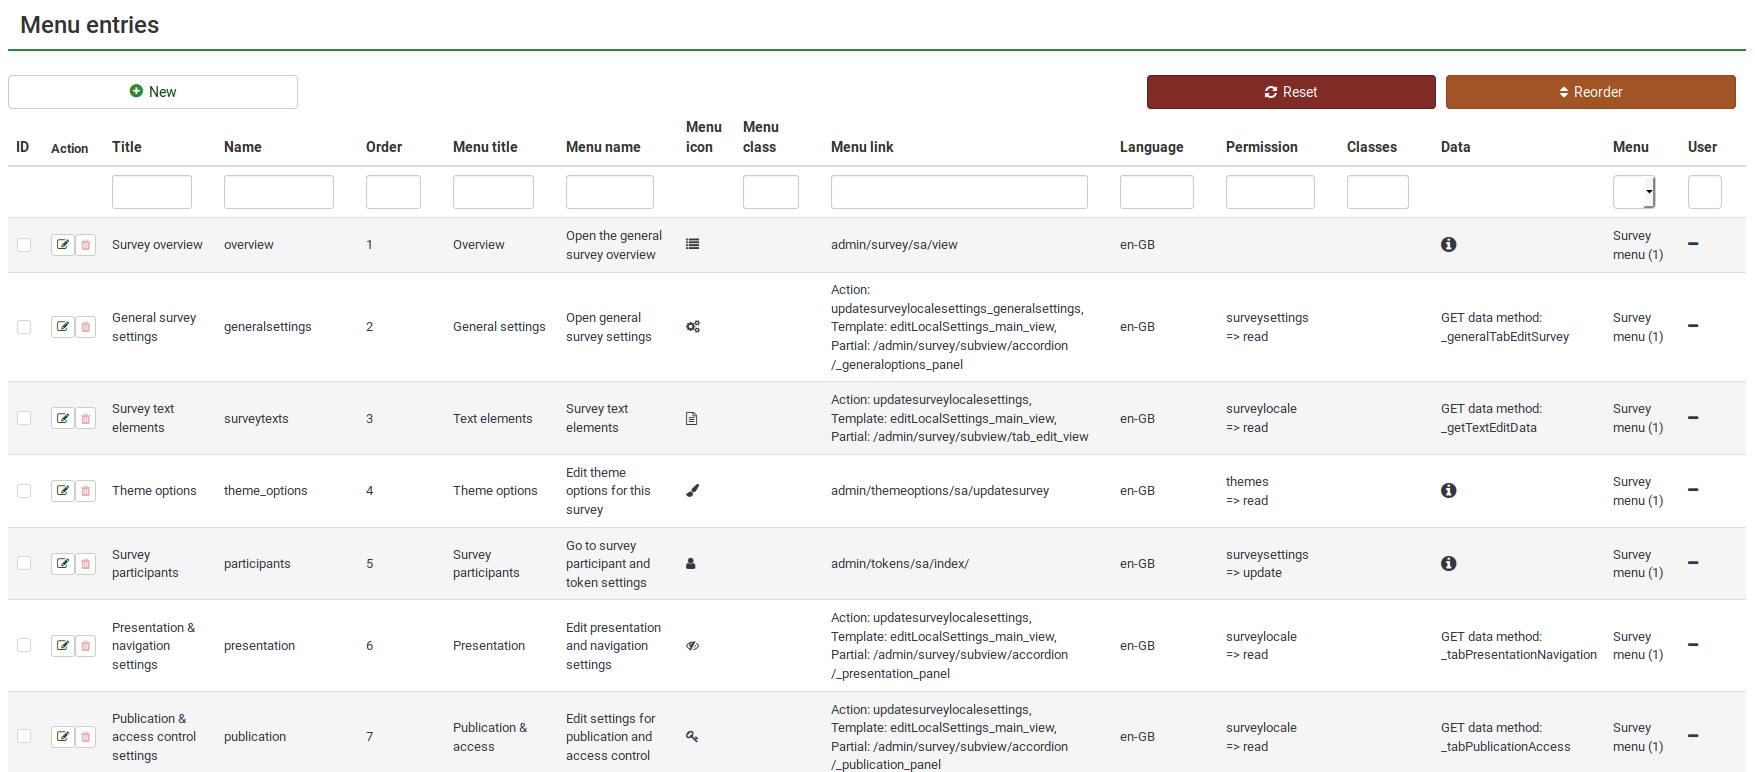
メニュー項目テーブルにアクセスするには、設定をクリックし、メニュー項目設定をクリックします。

この機能により、メニュー項目を作成、編集、削除することができます。表示するには、これらのエントリーをメニューに追加する必要があります。
メニュー項目設定

ユーザーは次の操作を実行できます。
To create a new menu entry, click on the + New button located on the top-left side of the window. Once clicked, you the following menu options will be displayed:
- Menu: Select the menu where the new entry will be located (read our wiki on how to create menus here);
- Name: Type in the name of the menu entry;
- Title: The title of the respective entry which will be displayed in the menu or under certain tabs (e.g., under the survey settings tab)
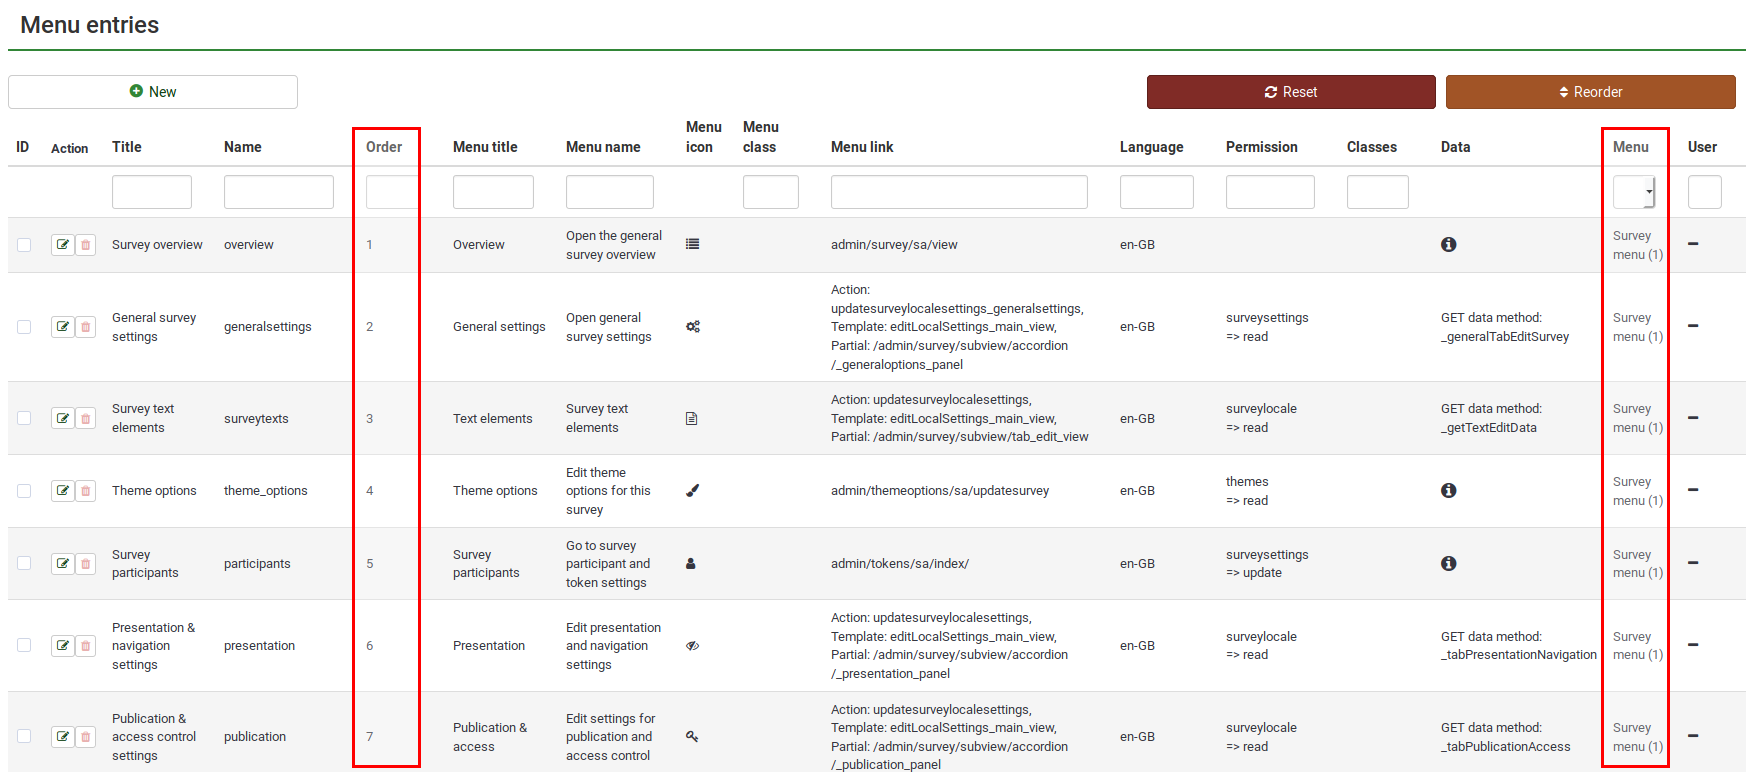
- Ordering: If more menu entries are added to a menu, use this function to order them.
- Menu title: Once you accessed a tab or a menu entry, the menu title will be displayed on the first line. For example, if you click on Overview which is located under the Survey settings tab, the overview panel will be displayed with the (menu) title: Survey overview
- Menu name: It is displayed when you hover the mouse over the respective entry. For example, if you hover the mouse over Theme options, the following message will show up: Edit theme options for this survey.
- Menu icon: All the used icons are fontawesome icons by default. To find other available icons, check the following link. Introduce in the box the string located after "fa fa-". E.g., for a floppy disk, we have "fa fa-floppy-o". To use it as an icon for a menu entry, type in this box only "floppy-o".
- Menu icon types: It depends on the ones used within your current theme. For further details, check the following wiki section.
- Menu class:
- Menu link: Link the menu entry to the URL of that function
- Permission:
- Permission grade:
If you would like to change the details of an already existing menu entry, click on the green button located in the Action column. The respective menu will get selected and you can do the edits.
If you want to delete a menu entry, click on the red trash button that corresponds to that respective menu entry (located in the Action column).
The ordering process takes first into account the menu an entry belongs to, and then it orders the entries according to the value from the order field. Once you change these values, click on the reorder button to get the entries rearranged in the table.

If you wish to reset all the values of the survey menu entries to their default values, click on the reset button located in the upper right part of the screen. A message will pop up asking you to confirm the action. Please note that once you confirm the action, all the custom menu entries will be lost.
Examples
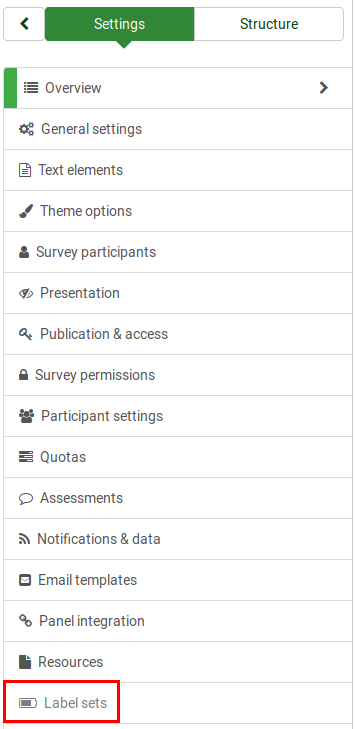
In this example, it will be shown how to add a Label sets menu entry to the default survey menu.
First, click on the + New button located on the top left side of the screen and start completing the fields:
- Menu: Select from the dropdown list the menu you wish to add to the menu entry.
- Name: labelsets.
- Order: 20.
- Menu title: Label sets.
- Menu name: "Click here to edit the available sets."
- Menu icon: Check the following link to find the right icon for the new menu entry. In the screenshot from above, I used "fa fa-battery-three-quarters".
- Menu icon type: Select from the dropdown box the "Fontawesome icon" option.
- Menu link: Find the URL of the option you wish to link the entry to, and copy everything after the website name (admin/labels/sa/view in our case):
Click on the create button and see if the new survey menu entry was added:

Once done, check the survey menu and see if the survey menu entry is functional:

When creating or editing a menu entry, you may find in the lower right part of the dialog the Toggle advanced options button. The following extra fields will be shown once you press it:
- Action
- Template
- Partial
- Classes
- Data
- Get data method
- Language
Once the edits are done, do not forget to click on the Save button.