Plugin - avanzati
From LimeSurvey Manual
Panoramica
A partire da LimeSurvey 2.05, LimeSurvey supporterà ufficialmente i plugin. Alcuni plugin saranno supportati dal team di LimeSurvey e entreranno nel core. Alcuni saranno supportati da altri al di fuori del team di LimeSurvey. Per aiutarti a trovarli, dai un'occhiata ai Plugin di terze parti disponibili e aggiungi il tuo plug-in!
I plug-in consentono agli utenti di personalizzare la funzionalità della loro installazione pur potendo beneficiare di regolari aggiornamenti software.
Questa documentazione è pensata per gli sviluppatori che stanno estendendo LimeSurvey per uso proprio o per i propri clienti; gli utenti finali non saranno aiutati da questa documentazione.
I plugin devono implementare l'interfaccia iPlugin. Ti consigliamo di estendere la tua classe di plugin dalla classe PluginBase.
I plugin sono sviluppati attorno a un meccanismo [1].
Impostazioni plugin
Estendendo, beneficerai delle funzionalità comuni richieste dai plug-in che abbiamo già implementato per te. Una di queste funzioni è l'implementazione della funzione getPluginSettings. Questa funzione deve restituire un array che descrive le opzioni di configurazione per l'utente.
Il plugin di esempio espone solo 1 impostazione configurabile, il messaggio che mostrerà.
protected $settings = array(
 'logo' => array(
 'type' => 'logo',
 'path' => 'assets/logo.png'
 ) ,

'messaggio' => array(
 'tipo' => 'stringa',
 'etichetta' => 'Messaggio'
 )
);
L'array contiene un nome per ogni impostazione come chiave. I valori sono matrici contenenti i metadati richiesti.
I tipi supportati sono:
- logo
- int (numero intero)
- stringa (alfanumerica)
- testo
- html
- rilevanza
- info
- password
- data! N!* selezionare
Oltre al tipo sono disponibili numerose altre chiavi:
- label, definisce un'etichetta
- default, definisce un valore da mostrare se non viene specificato alcun valore (solo per le impostazioni globali, non per le impostazioni del sondaggio)
- current, definisce il valore corrente.
- readOnly : mostrato le impostazioni come readonly
- htmlOptions, le htmlOptions della parte di input (vedi il manuale di Yii [[2]])
- pluginOptions, per alcune impostazioni (html o select): impostare l'opzione del widget
- labelOptions: htmlOpzioni dell'etichetta
- controlOptions: htmlOpzioni del wrapper di etichetta e input
Puoi trovare un esempio di plug-in utilizzando tutte le impostazioni effettive su exampleSettings
Leggi e scrivi le impostazioni del plug-in
È possibile leggere e scrivere le impostazioni del plugin direttamente dal codice del plugin.
Esempio:
$mySetting = $this->get('mySetting');
$this->set('mySetting', $mySetting + 1);
È possibile ottenere un valore predefinito se l'impostazione risulta essere nulla:
$mySetting = $this->get('mySetting', null, null, 10); // 10 è il valore predefinito
Eventi
I plugin si iscrivono agli eventi e possono interagire con LimeSurvey quando l'evento viene attivato. Per un elenco degli eventi attualmente disponibili, controlla Plugin events.
API
I plugin dovrebbero estendere LimeSurvey solo tramite la sua API "pubblica". Ciò significa che utilizzare direttamente le classi trovate nel codice sorgente è una cattiva pratica. Anche se non possiamo costringerti a non farlo, rischi di avere un plug-in rotto con ogni aggiornamento minore che facciamo.
Interagisci il più possibile con LimeSurvey solo tramite i metodi descritti qui. Come per gli eventi.
L'oggetto API è disponibile tramite $this->api durante l'estensione da PluginBase, altrimenti puoi ottenerlo dall'istanza PluginManager che viene passata al costruttore dei tuoi plugin.
Nuove funzioni possono essere aggiunte all'oggetto API su richiesta.
Estensione modulo (New in 6 )
Introduzione
Il sistema di estensione dei moduli è un modo più generale per estendere i moduli nel core di LimeSurvey senza aggiungere un nuovo evento per ciascun modulo.
Consiste dei seguenti componenti:
- Un modulo globale chiamato FormExtensionService
- Una libreria di classi di input che i plugin possono aggiungere all'inizializzazione del modulo precedente
- Un widget, insieme a renderer personalizzati, utilizzati nei file di visualizzazione di LimeSurvey
Ogni forma è identificata da una stringa di posizione, come<form name><dot><tab name> . Esempio: globalsettings.general o globalsettings.security .
Il punto dietro un sistema basato su classi senza HTML è liberare gli autori del plugin dal lavoro per aggiornare l'HTML quando l'HTML principale cambia. Tuttavia, l'autore può usare il tipo RawHtmlInput se necessario.
Una cosa che non puoi fare in questo sistema è aggiungere nuove schede modulo.
Esempio
Per aggiungere un nuovo input a un form da un plugin, usa il seguente codice dalla tua funzione init() :
TODO: Salva nelle impostazioni del plugin invece che a livello globale
// All'inizio del file
use LimeSurvey\Libraries\FormExtension\Inputs\TextInput;
use LimeSurvey\Libraries\FormExtension\SaveFailedException;

// Dentro init()
Yii::app()->formExtensionService->add(
 'globalsettings.general',
 new TextInput([
 'name' => 'myinput',
 'label' => 'Etichetta',
 'disabled' => true,
 'tooltip' => 'Moo moo moo',
 'help' => 'Alcuni testi di aiuto',
 'save' => function($request, $connection) {
 $value = $request->getPost('myinput');
 if ($value === 'qualche valore non valido') {
 throw new SaveFailedException("Impossibile salvare l'input personalizzato 'myinput'");
 } else {
 SettingGlobal::setSetting('myinput', $value);
 }
 } ,
 'load' => function () {
 return getGlobalSetting('myinput');
 }
 ])
);
Convalida
La convalida dell'input viene eseguita nella funzione save (vedere l'esempio sopra). Se il valore pubblicato non è valido, lancia un'eccezione SaveFailedException e all'utente verrà mostrato un messaggio flash di avviso.
Moduli supportati
Possono essere prorogate le seguenti forme:
- globalsettings.general (New in 6.0.0 )
Se desideri aggiungere il supporto per un altro modulo principale, devi applicare la seguente modifica in una richiesta pull:
Nel file di visualizzazione, aggiungi:
 <?php
use LimeSurvey\Libraries\FormExtension\FormExtensionWidget;
use LimeSurvey\Libraries\FormExtension\Inputs\DefaultBaseRenderer;
?>
... altro HTML
<?= FormExtensionWidget::render(
    App()-> formExtensionService->getAll('globalsettings.security'),
 nuovo DefaultBaseRenderer()
); ?>
Potrebbe essere necessario creare una nuova classe renderer basata su DefaultBaseRenderer , se il modulo HTML è diverso da altri moduli. Potrebbe anche essere necessario estendere la classe renderer predefinita con tipi di input non ancora aggiunti.
La seconda modifica che devi fare è aggiungere una chiamata alla classe del servizio di estensione del modulo nell'azione del controller che salva il modulo:
$request = App()->request;
Yii::app()->formExtensionService->applySave('globalsettings', $request);
Questo è tutto!
Localizzazione (New in 3 )
È possibile che i plug-in aggiungano i propri file locali. Il formato file utilizzato è .mo, come le traduzioni principali. I file devono essere archiviati in
<plugin root folder>/locale/<language> /<language> .mo
Dove "<language> " è una parola di due lettere come "de" o "fr".
Per utilizzare il file locale specifico, utilizzare la funzione plugin gT:
$this->gT("Un testo plugin che deve essere tradotto");
Se la stringa data non può essere trovata nel file locale specifico del plugin, la funzione cercherà nei file locali principali. Quindi è sicuro usare stringhe come "Annulla":
$this->gT("Annulla"); // Verrà tradotto anche se "Annulla" non è nel file locale del plugin
Se stai usando views insieme al tuo plugin, dovresti usare
$plugin->gT("Traducimi");
per eseguire la traduzione specifica del plug-in a tuo avviso.
Puoi utilizzare il file limesurvey.pot come esempio di come può apparire un file pot. Questo viene importato nel tuo strumento di traduzione.
Strumenti
Uno strumento open source per modificare i file po e mo è [3].
Registrazione (New in 3 )
Se vuoi registrare qualcosa dal tuo plugin, basta scrivere
$this->log("Il tuo messaggio");
Il livello di registrazione predefinito è trace, ma puoi fornire un altro livello di registrazione come secondo argomento facoltativo:
$this->log("Qualcosa è andato storto!", CLogger::LEVEL_ERROR);
Il file di registro può essere trovato nella cartella
<limesurvey root folder>/tmp/runtime/plugin.log
Il nome del tuo plugin viene automaticamente utilizzato come categoria. Un bel modo per vedere solo gli errori del tuo plugin è usare grep (su Linux):
$ tail -f tmp/runtime/plugin.log | grep <your plugin name>
More info about configuring logging in Yii 1: Optional_settings#Logging_settings.
Extension updates (New in 4 )
Since LimeSurvey version 4.0.0, there's a system in place to deal with plugin and other extension updates. To use this system, your extension config.xml file needs to include updater configuration.
<updaters>
    <updater>
        <stable>1</stable>
        <type>rest</type>
        <source>https://comfortupdate.limesurvey.org/index.php?r=limestorerest</source>
        <manualUpdateUrl>https://somedownloadlink.com/maybegithub</manualUpdateUrl>
    </updater>
</updaters>
(The source tag above points to the LimeStore REST API, which will be used for all extensions available in our LimeStore.)
| Tag | Description |
|---|---|
| stable | "1" if this source only gives you stable version numbers; "0" if the source will also provide unstable versions, like 0.3.3-beta.
|
| type | For now, only type rest is supported. It's easy to add new updater types (version checkers), like git, wget, etc.
|
| source | The URL to fetch new versions from. |
| manualUpdateUrl | URL which the user can go to to update the latest version of the extension. |
| automaticUpdateUrl | TODO |
If you don't want to supply an updater, you should put the following text in your config XML file:
<updaters disabled="disabled">
</updaters>
This way, you tell the system that you purposefully disabled the update system, and didn't just forget to add it.
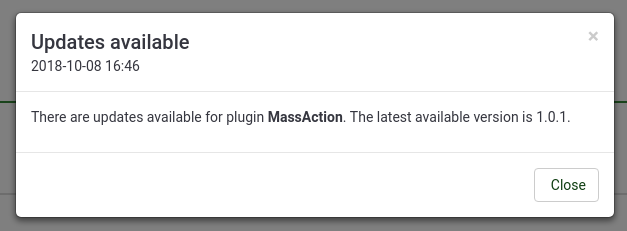
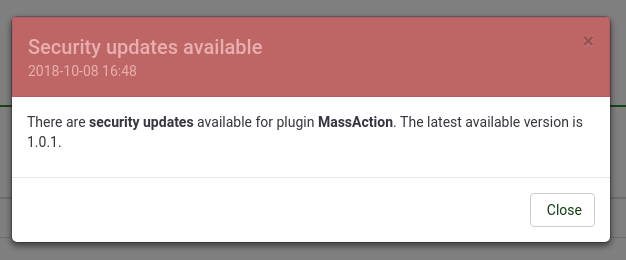
The new plugin UpdateCheck - installed and activated by default - checks for new updates for all installed extensions when a super admin logs in, asynchronously, max one time every 24 hours. If any new versions are found, a notification is pushed.
If a new security update is found, the notification will open automatically and be styled in "danger" class.
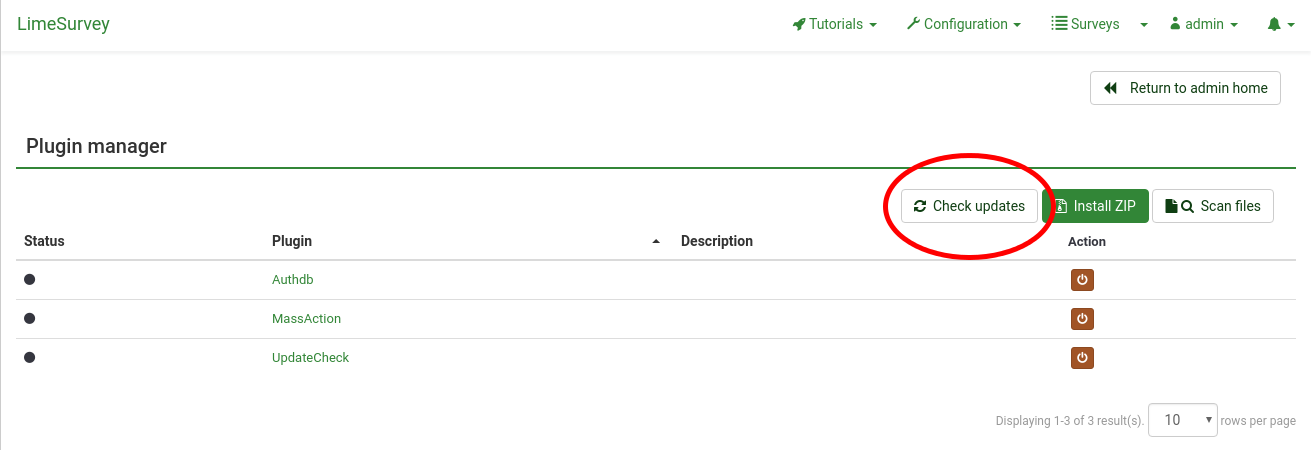
You can manually check for updates by going to the plugin manager view and click on "Check updates". Note that this button is only visible if the UpdateCheck plugin is activated.
Under the hood
This section provides a brief overview over the extension updater implementation.
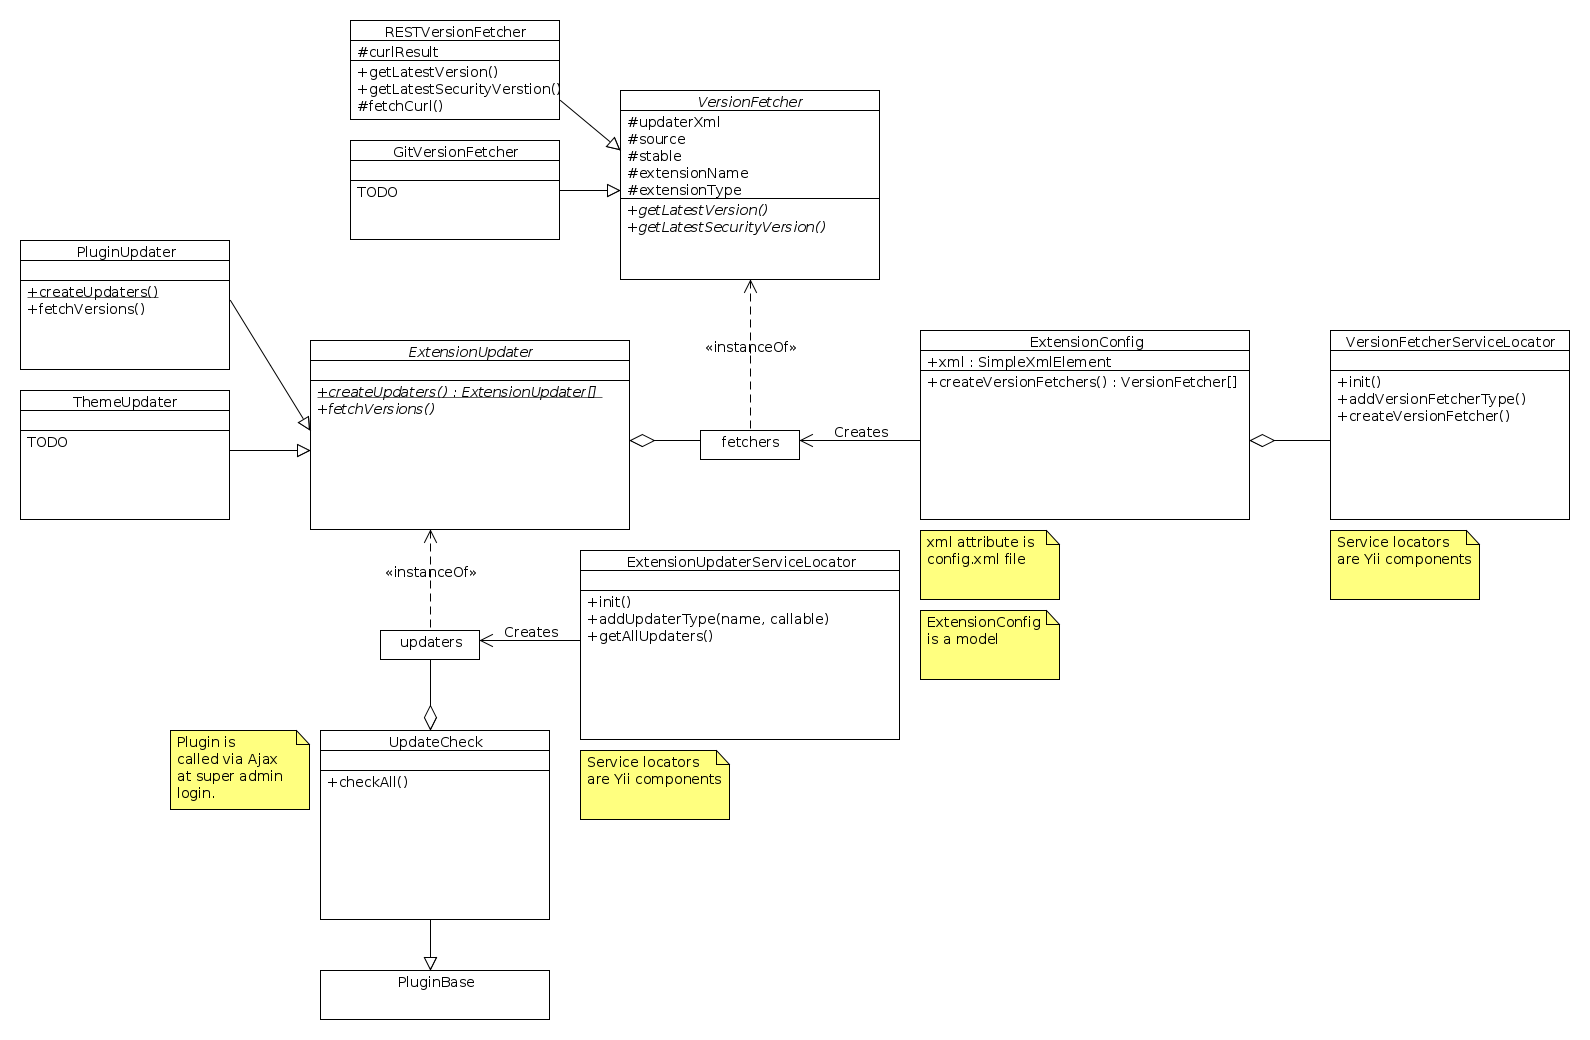
The extension updater is part of the ExtensionInstaller library. Below is a UML diagram for the classes related to the updater process.
Program flow when Yii starts:
 Yii init
   VersionFetcherServiceLocator->init()
     Add REST version fetcher
   ExtensionUpdaterServiceLocator->init()
     Add PluginUpdater
     TODO: Add an updater for each extension type (theme, question template, ...)
Program flow when running the UpdaterCheck plugin:
 Get all updaters from ExtensionUpdaterServiceLocator
 Loop each updater
   For each updater, loop through version fetchers configured by <updater> XML
     For each version fetcher, contact remote source and get version information
 Compose all versions into a notification
The checkAll method in the UpdateCheck plugin provides an example of how to query all extensions for new versions.
Adding new version fetchers
To add a new custom version fetcher, run this during Yii initialization:
$service = \Yii::app()->versionFetcherServiceLocator
$service->addVersionFetcherType(
  'myNewVersionFetcherType',
  function (\SimpleXMLElement $updaterXml) {
    return new MyNewVersionFetcher($updaterXml);
  }
);
Of course, the class MyNewVersionFetcher has to subclass VersionFetcher.
To use your new version fetcher, configure the type tag in the updater XML to use
myNewVersionFetcherType (instead of e.g. rest).
Adding new extension updaters
To add a new custom extension updater, run this during Yii initialization:
$service = \Yii::app()->extensionUpdaterServiceLocator;
$service->addUpdaterType(
  'myNewExtensionUpdater',
  function () {
    return MyNewExtensionUpdater::createUpdaters();
  }
);
Class MyNewExtensionUpdater has to subclass ExtensionUpdater.
The top type tag in config.xml ('plugin', 'theme', ...) will control which extension updater are used for this extension. The system is not fully customizable yet, since you also need to add a custom ExtensionInstaller, menu items, etc. But in theory, and maybe in the future, it should be possible to add a new type of extension this way.
Extension installer
The extension installer library consists of two abstract classes:
- ExtensionInstaller
- FileFetcher
The ExtensionInstaller is subclassed for each extension type, like PluginInstaller, QuestionThemeInstaller, etc.
The FileFetcher is subclassed for each different way to fetch files. Currently, only uploaded zip files are supported, but in the future, there could be a Github or LimeStore fetcher too.
Special plugins
Available plugins
Tutorial
This step-by-step tutorial shows how to create a plugin that sends a post request on every survey response submission. The tutorial shows you how to create and save global and per-survey settings, how to register events and more.


