Menu entries configuration: Difference between revisions
From LimeSurvey Manual
mNo edit summary |
No edit summary |
||
| Line 3: | Line 3: | ||
=General= | =General= | ||
[[File:Menu Entries Configuration.png|center]] | |||
To access the Menu entries table, click on '''Configuration''' and then on '''Menu entries configuration''' | |||
<center>[[File:Menu Entries Configuration.png|Menu Entries Configuration.png]]</center> | |||
This function allows you to create, edit or delete menu entries. In order to be shown, these entries have to be added into a [[Menu configuration|menu]]. | |||
=Menu entries configuration= | =Menu entries configuration= | ||
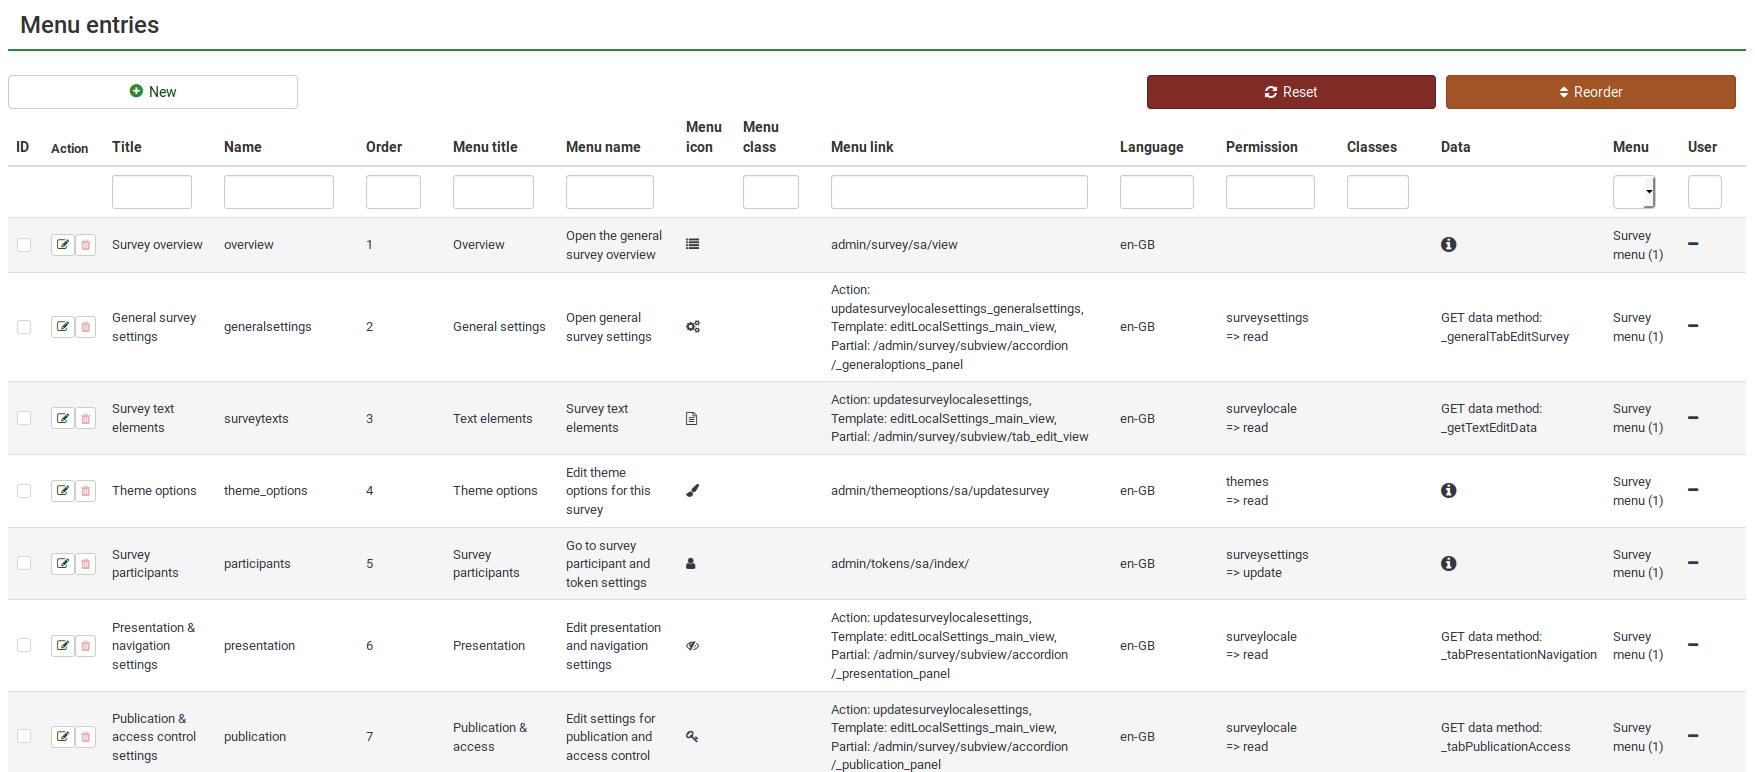
[[File:Menu Entries List.png|center]] | [[File:Menu Entries List.png|center]] | ||
The following actions are available to the users: | |||
*[[Create a new menu entry]] | |||
*[[Edit menu entry]] | |||
*[[Delete menu entry]] | |||
==Create a new menu entry== | |||
The following options are available: | |||
*'''Menu''': Select the menu where the new entry will be located ([[Menu configuration#Create a menu|read our wiki on how to create menus here]]) | |||
*'''Name''': | |||
*'''Title''': | |||
*'''Ordering''': | |||
*'''Menu title''': | |||
*'''Menu name''': | |||
*'''Menu icon''': | |||
*'''Menu icon types''': | |||
*'''Menu class''': | |||
*'''Menu link''': | |||
*'''Permission''': | |||
*'''Permission grade''': | |||
{{Note|[[Advanced options - menu entries|Read our wiki]] for information on advanced settings.}} | |||
==Edit menu entry== | |||
If you would like to change the details of an already existing menu entry, click on the green button located in the '''Action''' column. The respective menu will get selected and in the upper right the '''+New menu entry''' button changes to '''Edit menu entry'''. Click on it and do the edits. | |||
[[File:Create new menu entry.png]] | |||
[[File:Edit menu entry.png]] | |||
==Delete menu entry== | |||
If you want to delete a menu entry, click on the red trash button that corresponds to that respective menu entry (located in the '''Action''' column). | |||
=Examples= | =Examples= | ||
=Advanced options - menu entries= | |||
</translate> | </translate> | ||
Revision as of 12:42, 1 September 2017
General
To access the Menu entries table, click on Configuration and then on Menu entries configuration

This function allows you to create, edit or delete menu entries. In order to be shown, these entries have to be added into a menu.
Menu entries configuration

The following actions are available to the users:
The following options are available:
- Menu: Select the menu where the new entry will be located (read our wiki on how to create menus here)
- Name:
- Title:
- Ordering:
- Menu title:
- Menu name:
- Menu icon:
- Menu icon types:
- Menu class:
- Menu link:
- Permission:
- Permission grade:
If you would like to change the details of an already existing menu entry, click on the green button located in the Action column. The respective menu will get selected and in the upper right the +New menu entry button changes to Edit menu entry. Click on it and do the edits.
File:Create new menu entry.png File:Edit menu entry.png
If you want to delete a menu entry, click on the red trash button that corresponds to that respective menu entry (located in the Action column).